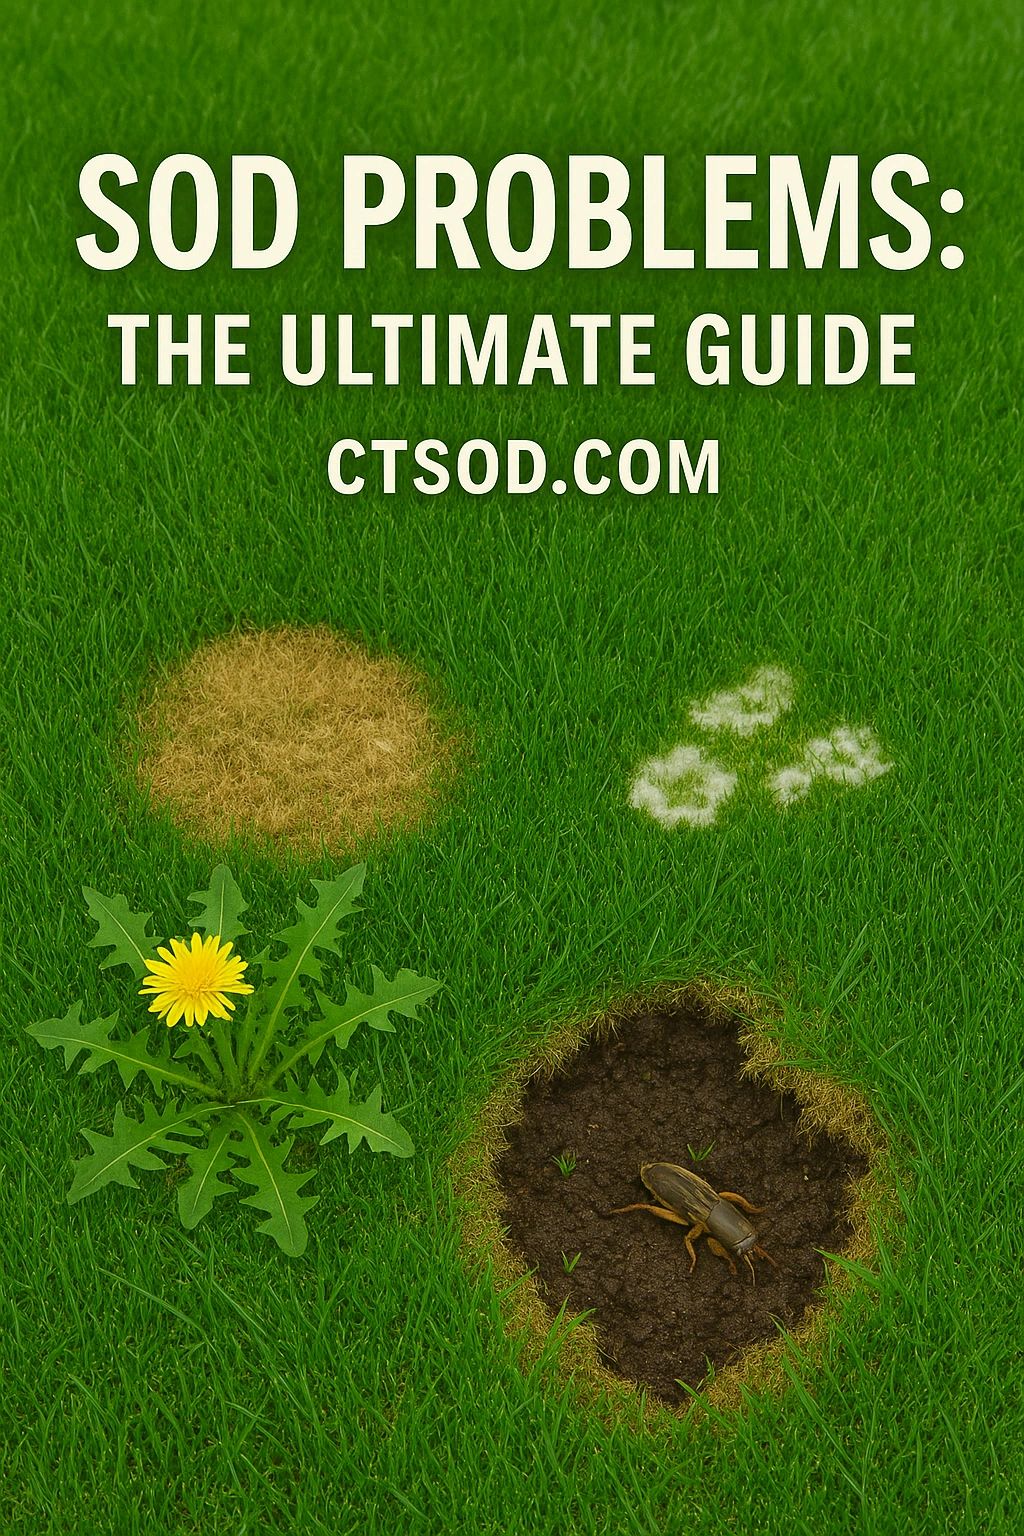

The Most Extensive Guide To New Sod Problems On The Planet -
Every Sod Issue We Could Think Of With Every Solution
Installing new sod is an exciting way to instantly transform your lawn. However, the first three months after laying cool-season turfgrass sod (like Kentucky bluegrass, fescue, or ryegrass) are critical for its successful establishment. During this period, new sod is vulnerable to a variety of problems that can cause discoloration, poor growth, or even sod failure if not addressed promptly. This comprehensive guide will help both homeowners and turf professionals identify every common problem that can arise in new sod, understand the symptoms and likely causes, and implement detailed solutions and preventative measures.
Why focus on the first 3 months? This is the establishment phase when sod is developing new roots and adapting to your soil. Think of new sod like a “baby plant” – it may look like a lush mature lawn on top, but its roots have yet to fully anchor into the ground. Improper care or unforeseen issues during this time can lead to sod drying out, rotting, or failing to root. By learning how to recognize problems early and take corrective action, you can ensure your cool-season turf becomes a healthy, thick lawn that both novice gardeners and seasoned turf professionals will appreciate.
Below, we cover all aspects of new sod care and troubleshooting: water management, soil conditions, rooting issues, mowing and maintenance mistakes, pest infestations, weed invasions, fungal diseases, and environmental stresses. For each category, we’ll explain the potential symptoms you might observe, dig into the likely causes, and then provide specific solutions and preventative tips. Let’s dive in!
Watering Issues: Underwatering vs. Overwatering
New sod has very specific watering needs. Too little or too much water in the first weeks can quickly turn that beautiful green carpet into a patchy brown mess. Since water management is the single most important factor for new sod survival, it’s crucial to get it right. Here’s how to recognize and fix watering problems:
Underwatering (Drought Stress)
Symptoms: Sections of the sod are turning light brown or straw-colored, and the grass blades are dry, crunchy, or wilting. You might notice the sod edges or corners (especially near driveways or buildings) browning out faster than the center. The sod may also feel less tacky to the soil – if you lift a corner, it might not have begun rooting because it’s been too dry. In severe cases, the sod may begin to shrink or curl at the edges due to dehydration.
Likely Cause: Insufficient water is reaching the sod, especially in the critical first week or two after installation. New sod has no deep roots yet, so it needs frequent moisture in the top few inches of soil. Underwatering can happen if you’re not watering long enough or often enough, or if the sprinkler coverage is uneven (it’s common for sprinklers to miss edges and corners). Hot, sunny weather will exacerbate drying, as will reflected heat from nearby pavement or walls. If sod is laid on compacted or poor soil, water might not infiltrate properly, leaving the roots dry even if you water (more on soil issues later).
Solutions: Immediately increase watering to rehydrate the sod and soil. In the first 1–2 weeks, new sod should be watered at least once per day, or even more frequently in hot weather. Water deeply enough to moisten the soil underneath the sod (you can peel up a corner to check that the soil is damp but not waterlogged). Ensure the entire area is getting coverage – adjust sprinklers to hit edges and corners, and consider hand-watering those trouble spots with a hose if needed. For cool-season grasses, early morning watering is ideal to reduce midday evaporation while giving grass blades time to dry by nightfall (reducing disease risk).
If the sod has begun to brown but the roots are still alive, proper watering can often revive it by breaking dormancy. Cool-season grass that went brown from drought isn’t necessarily dead – it may just be dormant and can green up again once it receives adequate moisture. Keep the soil consistently moist (not bone-dry) for the next couple of weeks and watch for improvement. Also, pay extra attention to areas near buildings or concrete where heat causes faster drying; these might need a bit more water.
Prevention: From day one of sod installation, follow a diligent watering schedule. A common recommendation is: water immediately after laying the sod (a good 20-minute soaking to wet the soil underneath), then water daily (or even 2–3 times a day in short sessions) for the first 1–2 weeks. The goal is to keep the top 2–3 inches of soil moist at all times during the initial shallow rooting phase. After the first 2 weeks, you can start tapering to an every-other-day deep watering in weeks 3–4 to encourage deeper root growth. Always monitor the sod’s appearance – if you see any hints of wilting or dryness, increase watering frequency or duration accordingly. Proper irrigation setup is key: check your system before sod arrives to ensure no broken sprinkler heads or coverage gaps. Finally, avoid watering in the late evening, as grass that stays wet overnight is more prone to fungal disease.
Overwatering (Soggy Sod and Root Rot)
Symptoms: Instead of being dry, the sod and soil are constantly soaked or squishy to walk on. You might see yellowing grass or even patches of brown that appear to rot from the roots up. Overwatered new sod often looks limp and may develop a foul, sour smell in extreme cases (a sign of anaerobic soil). Another clue is the presence of fungus: overwatering creates a perfect environment for diseases like pythium blight or mushrooms to appear (more on diseases later). If you tug on the sod, it might feel like the roots haven’t anchored – not just from being new, but because they’ve rotted or have no oxygen to grow into the saturated soil. Mushy or slimy areas are a red flag.
Likely Cause: Too much water with insufficient drainage or drying time. New sod does need a lot of water initially, but it’s easy to go overboard. Overwatering can happen if you mistakenly keep watering heavily after the sod is already uniformly wet, or if you maintain a daily heavy watering schedule well beyond the first couple of weeks. Heavy clay soils or poorly prepared sites that don’t drain well can exacerbate pooling and waterlogging. Cool-season grasses in particular are vulnerable to root rot and fungal issues when kept too wet, especially in warm weather. Remember, sod farms often recommend watering, but overwatering is actually worse than underwatering in terms of long-term damage – roots in waterlogged soil can literally suffocate (lack of oxygen) and decay.
Solutions: If you suspect overwatering, back off on the irrigation immediately to let the sod and soil dry out a bit. You don’t want to let it dry to the point of drought stress, but do allow the surface to dry between waterings. Feel the soil under the sod: it should be moist, not a muddy swamp. Reduce watering frequency to perhaps every other day or every two days, depending on weather, and water more deeply rather than frequently. This encourages remaining healthy roots to grow downward in search of moisture and helps the soil breathe. In areas that have puddled, you may need to improve drainage: carefully lift the sod and add a bit of sand or compost to absorb excess water, or aerate gently with a pitchfork (if the sod is very new, be cautious not to tear it). For any rotting patches, trim out truly decayed sod so it doesn’t spread disease, and allow the area to dry before rewatering.
If root rot or fungus is suspected (for example, if you see discolored rings or mold – see the disease section below), you might need to apply a fungicide. Some lawn professionals actually apply a preventative fungicide on new sod as a precaution, given the high moisture levels initially. If you do this, choose a systemic fungicide labeled for sod/root rot control and follow instructions closely.
Prevention: The key is balance – keep the sod moist but not constantly sopping. Watering new sod is a bit of an art. As a rule of thumb, in the first ~10 days, you want to keep the surface damp with frequent short waterings. But after that, you transition to fewer, deeper waterings. Don’t stick rigidly to a timer if conditions don’t warrant it; for example, if it’s cool and rainy, you can skip a scheduled watering to avoid oversaturation. Ensure the site has good drainage before sodding: proper soil prep (loosened soil, added organic matter) helps prevent water from pooling. If you notice water pooling in certain low spots after irrigation, consider pausing and letting it soak in, or split your watering into two shorter back-to-back cycles to improve absorption. Remember that overwatering can be more deadly than underwatering because rot is often irreversible. It’s easier to add water to dry sod than to save drowned roots, so err on the side of caution after the initial establishment phase.
Soil and Installation Problems
Sometimes the issue isn’t how you’re watering, but what’s going on beneath the sod. Proper soil preparation and sod installation techniques are critical to sod health. When these are not done right, you can get problems like poor rooting, uneven growth, or sections of sod failing. Here we’ll discuss soil compaction, “floating” sod (air gaps), and other installation-related woes.
Soil Compaction and Poor Preparation
Symptoms: The new sod is not thriving: it may be turning brown in spite of adequate watering, or water might be running off the surface without soaking in. You could notice that when you try to push a screwdriver or finger into the soil through the sod, it’s very hard – indicating compacted soil. In some cases, the sod might be coming out of dormancy very slowly or staying brownish despite watering and sunlight. Compaction can also contribute to patches of disease or moss (in very compact, damp shaded spots) since healthy grass roots struggle in hard soil.
Likely Cause: If the ground was not properly prepared (loosened and amended) before sodding, the soil underneath might be too hard or dense for roots to penetrate. Compacted soil has less pore space for water and oxygen, so even if you’re watering, the water may not be infiltrating to the root zone. The grass essentially “sits” on a hardpan and can’t send roots down, leading to weak sod that can dry out easily or starve. Soil compaction can be pre-existing (common in new construction sites or heavy clay yards) or caused during installation (e.g., heavy equipment or foot traffic on the soil). If sod is laid over un-loosened soil or old thatch, it’s like placing a carpet over a concrete floor – the roots have a tough time.
Solutions: If you suspect compaction under your sod, you may need to take action even if it means disturbing the sod temporarily. Gently lift a section of the sod where grass is struggling (you can cut a small corner or edge out for exploration). If the soil beneath is indeed hard and compacted, consider these steps:
- Aerate or Loosen the Soil: For small areas, you can use a hand aerator or garden fork. Pull up the sod, poke holes or slits in the soil or even lightly till it if feasible. Remove any large clods or rocks that are obstructing root growth. Work in a bit of compost or sand to improve soil structure if possible. Then relay the sod and press it down firmly. Water thoroughly to help re-settle the sod. In many cases, the grass will recover once its roots have an easier path. (It’s best to do this repair early in the sod’s life rather than later, so it can re-establish quickly.)
- Topdressing: If pulling up the sod isn’t practical over a large area, you can try aerating the sod in place (if it’s rooted enough to handle that, usually after a few weeks) and then topdressing with a thin layer of compost or soil to help improve surface conditions. The added soil can work its way into the holes and create channels for air and water.
Going forward, keep the soil slightly on the moist side while the grass re-roots into the loosened soil – but not waterlogged, since you don’t want to compact it again. Monitor the color; if the sod starts greening up, you know it’s working.
Prevention: Ideally, prepare the soil before sod installation to avoid this problem altogether. Proper prep includes removing old vegetation, tilling or loosening the top 2–4 inches of soil, and mixing in organic matter or sand to fix drainage issues. Also, make sure the grading is correct so water doesn’t pool (level out low spots and ensure a slight slope for runoff if needed). A well-prepared soil bed should be loose, fertile, and well-draining – this gives new sod roots an immediate head start. It’s also wise to do a soil pH test and nutrient test; cool-season grasses do best in slightly acidic (pH ~6.0–7.0) soil. Adjust pH with lime or sulfur as recommended before laying the sod, because doing it after is harder. Finally, avoid heavy machinery or excessive walking on the freshly prepped soil before or during sod laying – you don’t want to undo the loosening work. If, despite prep, you suspect some spots are compacted (maybe from a wheelbarrow path), address them early with the methods above. Healthy soil is the foundation for a resilient lawn, and it will prevent a host of other issues (like disease and poor rooting) down the line.
“Floating” Sod and Air Pockets
Symptoms: Certain pieces or corners of the sod never seem to knit down into the soil. You might notice that those sections can still be lifted easily even after a couple of weeks, and the grass in those areas may be browning or not growing. The sod could feel slightly springy or sponge-like when you step on it, indicating a gap beneath. In some cases, you’ll actually see the sod shrinking away from the ground or adjacent pieces, leaving gaps or visible seams. These are classic signs of poor sod-to-soil contact.
Likely Cause: “Floating sod” occurs when there are air pockets between the sod and the soil beneath. This often results from improper installation techniques – for example, if the soil surface wasn’t properly leveled or if clumps of soil prevent the sod from laying flat. It can also happen if the sod wasn’t pressed down (rolled) after installation, or if the ground has slight depressions. Another scenario is if the sod dried out and shrank before the roots secured, causing it to curl up and lose contact. In any case, those air gaps mean the sod’s roots stay suspended and dry, unable to grow into the soil, which leads to poor rooting and browning. You’ll often see this at the corners of rolls or along seams if they weren’t tightly butted together.
Solutions: Fixing air pockets usually involves re-establishing contact between sod and soil:
- Roll and Water: If the sod is still relatively fresh (within the first week or so) and you notice it hasn’t settled, a simple fix is to water the area thoroughly and then use a lawn roller to press the sod down. Rolling pushes out air pockets and ensures the sod’s underside touches soil. Make sure to roll in multiple directions and overlap your passes.
- Lift and Re-lay: For more persistent gaps or if rolling isn’t enough, gently lift the affected sod section and check underneath. Add soil to fill any depressions or remove any lumps that are preventing contact. Then lay the sod back down firmly. You can even step on it or tamp it by hand to press it in place (just don’t overdo it to the point of compacting the soil excessively).
- Keep it Moist: After addressing the contact, maintain good moisture. When sod is wet, it’s heavier and more pliable, which helps it conform to the soil surface. Moisture also encourages the roots to grow downward into the soil. Avoid letting these sections dry out, because that’s when sod will curl or shrink and reintroduce gaps.
- Secure if Needed: In some cases on slopes or oddly shaped patches, sod staples (U-shaped pins) can be used at the edges to hold sod in place and flush with the soil. This prevents shifting and helps roots grab hold.
After these interventions, check progress by tugging on the sod after a week – it should start to feel “tacked down” as roots grab.
Prevention: During installation, be very attentive to soil contact. The ground should be smooth and even – fill low spots and break up clods. Lay sod strips snugly against each other (no overlapping or big gaps). Once laid, always roll the new sod (or at least walk it with foot pressure) to eliminate air pockets – this is a step sometimes skipped in DIY installs but it’s crucial for root contact. Water immediately after install to help the sod settle and mold to the surface. Also, avoid stretching sod pieces (which can cause them to later shrink), and never let sod sit out and dry up before it’s on the ground. If you’re working on a very hot day, lay small sections and water them right away rather than waiting until the entire lawn is sodded. By ensuring tight contact from the beginning, you’ll prevent the floating sod issue entirely and your sod will root much faster.
Sod Not Rooting or Establishing
Symptoms: After a couple of weeks, you test your new sod by gently pulling up a corner – and it lifts without resistance, meaning few or no roots have penetrated the soil. Your sod may also still look limp or is yellowing, indicating it’s living off stored energy and not tapping into the soil’s nutrients. In a healthy scenario, by 2–3 weeks you should see new white roots underneath and feel the sod becoming harder to lift. If that’s not happening, something is delaying rooting. You might also notice the sod looks the same length (hasn’t grown much) and hasn’t needed mowing after several weeks, another clue it’s not established. In worst cases, unrooted sod can start to brown because it’s essentially starving or drying out.
Likely Cause: Normally, sod goes through two stages of rooting: shallow rooting in the first 1–2 weeks, then deeper rooting over the next month. If shallow roots didn’t establish, the cause could be any of the issues above (underwatering, overwatering/rot, soil compaction, or air gaps). In other words, something is interfering with the sod’s ability to send out new roots. Common culprits:
- Insufficient water in the first week: Without constant moisture, the sod’s root growth slows or stops as it goes dormant.
- Excess water or poor drainage: Roots can’t grow in oxygen-starved soil, or they may have rotted.
- Soil contact issues: Floating sod or hard soil will prevent roots from penetrating as discussed.
- Fertilizing too early: Applying fertilizer in the first couple of weeks can actually shock the sod or “burn” tender new roots, hindering root growth (more on fertilizer issues later).
- Mowing or traffic too soon: If you mowed the sod before it rooted or walked on it, you might have physically dislodged new roots or compacted soil, setting the rooting back.
- Sod quality and timing: Occasionally, sod cut from the farm and delivered may have very short cut roots (less rooting material) or if it sat on the pallet too long, it was stressed. Also, sod laid in cooler fall weather might root more slowly (taking longer than 2 weeks for shallow rooting).
Solutions: The first step is to identify and fix the underlying cause (as per the relevant sections: adjust watering, fix soil issues, etc.). Once conditions are corrected, the sod can often resume rooting. Here are additional measures to encourage rooting:
- Root Stimulation: After about 2–3 weeks (when you’re sure it’s not rooting well), you can apply a root-boosting fertilizer if you haven’t fertilized yet. Choose a starter fertilizer that’s rich in phosphorus (the middle number, e.g., a 10-10-10 balanced fertilizer, or a starter like 18-24-12). Phosphorus supports root development. Make sure to water it in thoroughly to avoid burn and get nutrients into the soil. (Never fertilize sod that’s bone-dry; water first, then fertilize, then water again.)
- Ensure Water Penetration: Use a screwdriver test – push a screwdriver through the sod into the soil after watering. If it doesn’t go in at least 4–6 inches easily, the soil may be too dry or too hard beneath. Adjust watering to ensure deeper moisture in the soil every few days (which coaxes roots deeper). Conversely, if the soil is muddy and the sod is still not rooting, you likely have a rot issue – let things dry out as discussed.
- Avoid Further Stress: Do not mow or heavily traffic the sod until it clearly has some hold. If you tried mowing too early, you might have to hold off and give it more time. Also, refrain from herbicides or any chemicals that could add stress during this vulnerable time.
- Time and Patience: Sometimes, especially in cooler weather, sod just takes longer to root. If you’ve addressed everything and it’s not actively dying (just not knitting down), give it a bit more time while maintaining optimal conditions. Grass is resilient – you might find that by week 4 or 5 it finally catches and starts growing vigorously.
Prevention: Most of the preventative steps are those already covered: proper watering schedule (daily at first, then taper), rolling the sod, soil prep, and holding off on mowers and fertilizers initially. One additional tip: some experts recommend a light application of root-stimulating fertilizer around 3–4 weeks after install (not before) to kickstart deeper rooting. Another preventive measure is to plan sod installation at a good time – spring or early fall for cool-season sod, when temperatures are moderate, can result in quicker rooting compared to the scorching midsummer. If you must lay sod in very hot weather, be extra vigilant with water (but not too much) and even consider a prophylactic fungicide to protect those tender roots from rot. By two months in, your sod should have a decent root system forming; if you’ve gotten it that far, major rooting problems are largely behind you.
Mowing and Maintenance Mistakes
Mowing a new sod lawn for the first time is a milestone – but doing it wrong can cause big problems. Along with mowing, other maintenance aspects like foot traffic or using the wrong practices too soon can harm an establishing lawn. Let’s cover the pitfalls of mowing, walking on new sod, and early fertilization or weed control mistakes.
Mowing Too Soon or Too Low
Symptoms: If mowed too early, you might see strips of sod that were sucked up or shifted by the mower. The sod could have uneven height where pieces lifted. If mowed too short (scalped), the grass may turn yellow or brown in areas, and you might see the sod’s seams or soil because too much leaf was removed. Cutting very low can also weaken the sod, making it slow to recover or prone to disease (scalped areas often invite weeds and fungus due to stress).
Likely Cause: Mowing before the sod is rooted can literally tear the sod because the mower’s vacuum and blade action tug on the unanchored grass. This is why timing is crucial – new sod should resist gentle tugs (i.e., have some root hold) before you mow. Additionally, mowing too low (often called “scalping”) removes the grass blade length that the plant uses for photosynthesis, starving the roots of energy. In early sod life, the grass needs plenty of leaf area to produce food and establish roots. Some people also make the mistake of mowing as soon as the sod is laid (perhaps to “even it out”), which is a big no-no.
Solutions: If the sod was accidentally mowed too soon and got torn or shifted, immediately stop mowing and assess the damage:
- Press any disturbed sod pieces back down and make sure they contact the soil. You might need to re-align seams or even replace sections if badly ripped.
- Water the lawn to reduce stress (but not to swamp it) and help the grass recover.
- Then wait longer for the sod to firmly root before attempting to mow again – usually at least another week or more.
For scalped or overly short grass, the main remedy is to give it time to regrow. Make sure the lawn is adequately watered and perhaps avoid heavy foot traffic since short grass has less cushioning and is more easily damaged. You could apply a light dose of fertilizer if it’s past the initial 3-4 week period, to encourage regrowth (but if it’s within the first 2 weeks, don’t fertilize yet, just water and wait). Monitor for any disease in scalped areas; sometimes fungus can attack weakened grass, so keep an eye out and treat if needed.
For the next mow, set the mower high and ensure the blades are sharp to minimize tearing. A dull mower can shred grass blades and cause tip browning, which in a new lawn can look particularly bad or invite disease. A good rule: never remove more than one-third of the grass blade length in a single mow. So if your cool-season sod was 3 inches tall, don’t cut lower than 2 inches on that first mow.
Prevention: Patience is the key. Generally, wait until the grass is about 3–4 inches tall and the sod has been down for at least 2 weeks (often closer to 3 weeks) before the first mow. Perform the “tug test” on a few spots – gently pull up on the grass; if the sod lifts or feels like it could, it’s not ready. If it stays put, the roots likely have some hold and you can mow. When you mow:
- Set your mower blades to a high setting (3–4 inches height for cool-season grasses is a healthy range, especially the first mow).
- Ensure the grass is dry before mowing to avoid clumping and turf damage.
- Mow in a straightforward pattern without rapid turns on the lawn; turning wheels can scuff new sod.
- If the clippings are excessive, bag them or rake up – heavy clumps of clippings can smother spots of new grass.
- Sharpen your mower blade before that first cut. Fresh sod is tender and cuts best with a sharp blade, reducing ragged edges.
Also, consider mowing a little higher in summer or if the sod is slightly weak; longer blades help shade the roots and hold moisture. For instance, in summer, 3 to 3.5 inches is good for many cool-season grasses, whereas in cooler fall weather you might mow at 2.5 inches safely. The mantra is “low and frequent foot traffic, high mowing height” for new sod to thrive.
Foot Traffic and Heavy Use
Symptoms: Areas of the sod look uneven, sunken, or the seams between sod pieces have become more visible – possibly from being squished by footsteps. You might see actual depressions or worn paths where people (or pets) repeatedly walked. In severe cases, the sod could shift or wrinkle from being pushed around. Additionally, compacted footprints can kill the grass blades, leaving yellow or brown shoe-shaped patches. If vehicles or equipment were on it, you may have ruts or large damaged areas.
Likely Cause: Walking or running on the sod too soon after installation. New sod needs time to knit into the soil; any traffic can disrupt that process by either compacting the soil (squeezing out the air the roots need) or physically moving the sod. The first 2–3 weeks are most crucial where you should minimize activity on the lawn. Heavy items like lawn furniture, ladders, or even a lawn mower (as discussed) can dent the sod. Pet traffic, especially dogs that like to run the same path or start and stop quickly, can also tear up new sod. Essentially, any foot traffic disturbs the delicate root-soil connection and can cause long-term unevenness or poor rooting in those spots.
Solutions: If foot traffic damage is noticed early:
- Stay off it immediately to prevent further harm. Reroute family members and pets away from the new lawn for now.
- Lightly water the affected areas – moist soil can sometimes “rebound” a bit from compaction, and the grass can recover if the crowns (growing points) weren’t crushed completely.
- For minor footprints or impressions: you can often fix these by lifting the corner of the sod and adding a handful of soil underneath to level it, then pressing it back down. The grass will fill in any tiny gaps over time.
- For more severe compaction (wider areas), once the sod is a bit more established (say after a few more weeks), you may consider aerating those spots or at least poking some holes with a fork to loosen the soil. However, avoid aggressive aeration until the lawn is mature (6+ months), since doing it too early can further disturb roots.
- If a section was completely destroyed (e.g., a big skid or rut from something heavy), you might need to patch it. Cut out the damaged sod, re-loosen and fill the soil, and put in fresh sod or seed. Keep that patch well-watered and treat it as “new sod” again.
Prevention: Limit all activity on new sod for at least the first 2 weeks, preferably 3 weeks if you can. This means no walking, playing, or mowing during that initial period. If you absolutely must cross it (say to water by hand or adjust a sprinkler), lay down a wooden board or piece of plywood to distribute your weight, and step carefully. Remove it right after. Keep pets off; if you have a dog, accompany them outside to do their business in a designated mulched or old grass area rather than the new sod. Consider temporary fencing or signage to remind everyone to stay off. After about 14 days, you can test a small area – if it’s rooted well, light use can resume, but still avoid repetitive heavy traffic.
Even once you start using the lawn, try to vary your walking patterns for the first couple of months. Don’t let the dog or kids run the exact same track every day, as that can create paths. Ultimately, once fully rooted and established, your lawn will handle normal foot traffic, but early on it’s like wet cement – treat it gently until it “sets.”
Early Fertilization and Chemical Use
Symptoms: The sod turns an odd shade of brown or yellow after you applied a product. You might see striping in the lawn (lines of different color) if fertilizer was applied unevenly, or burned-looking patches where perhaps a stronger chemical spilled. If it’s a fertilizer burn, the grass usually turns brown starting at the leaf tips and can progress to kill patches. In the case of herbicide injury (from weed killers), the grass may become twisted, discolored (whitish or reddish), or stop growing. Essentially, the lawn’s appearance worsens following a treatment.
Likely Cause: Fertilizing too early or using inappropriate lawn chemicals on new sod. New sod typically comes fertilized from the farm, and its young roots cannot handle additional fertilizer right away. Adding fertilizer in the first few weeks can “burn” the grass or chemically stimulate it at a time when it can’t use those nutrients, leading to stress and dormancy. High nitrogen fertilizers are particularly risky early on. The same goes for herbicides – most weed control products explicitly say not to use on new sod until it’s mowed a certain number of times or after so many weeks. New sod is sensitive; herbicides can easily damage it or slow down rooting. Even some pre-emergent herbicides (for weed prevention) can inhibit root growth in fresh sod if applied too soon. Essentially, flooding a newly laid lawn with chemicals can do more harm than good.
Solutions: If you suspect fertilizer burn (e.g., you fertilized and now the grass is browning), the immediate step is to flush the area with water. Heavy watering can help leach excess fertilizer salts down through the soil and away from the sod’s root zone. Do this as soon as you notice a problem. The grass may recover if the roots weren’t completely desiccated by the fertilizer. You should also refrain from further fertilization for at least another month and let the sod recuperate.
If herbicide damage occurred (perhaps you sprayed for weeds and now the grass looks hurt), unfortunately there’s not much to do to reverse chemical injury except water the lawn to dilute residues and wait. Many herbicide effects will diminish over a few weeks. Watch the new growth; if the new leaves come out normal, the sod will likely outgrow the injury. If large areas were killed, you may need to reseed or re-sod those spots later.
In either case, ensure the lawn is getting gentle care – proper watering, no additional stress – so it can recover. Sometimes a light fertilizer after a month or two can help the lawn fill back in, but timing is critical – don’t re-fertilize too quickly.
Prevention: Hold off on fertilizing your new sod for the first 3–4 weeks after installation. A good rule is to wait until you’ve mowed the new lawn at least once (or even twice) before fertilizing, which indicates the grass is actively growing and has some root establishment. When you do fertilize, use a starter fertilizer or a balanced formulation, not a high-nitrogen quick-release type. Follow the recommended rates – more is not better. If in doubt, err on the side of under-fertilizing; you can always feed the lawn later, but you can’t easily undo a burn.
Regarding weed control: do not use herbicides (weed killers) on new sod for at least the first month or until roughly 3 mowings have occurred. The sod needs time to mature and any residual herbicide can also hurt root growth. Instead, if weeds appear, hand-pull them carefully (try to pull from the edges of sod pieces to avoid stepping on the sod). It’s common to get a few weeds, especially along seams or edges, because pre-existing weed seeds can sprout. Focus on growing a healthy lawn; a thick turf will naturally suppress many weeds over time. After about 4–6 weeks, you can consider spot-treating any persistent weeds with a gentle post-emergent herbicide safe for your grass type. For crabgrass or annual weeds, you typically wouldn’t apply a pre-emergent until the next season (if you laid sod in spring, skip pre-emergent that year and hand-pull crabgrass; if in fall, you can apply a pre-emergent the following spring). Always read labels for “new sod” precautions. In summary, feed and weed at the right time: give the sod a few weeks head start before adding fertilizer, and delay weed chemicals until it’s stronger.
Weed Invasion in New Sod
One of the appeals of sod is that it arrives virtually weed-free – a perfect carpet of grass. However, that doesn’t mean weeds won’t try to sneak into your new lawn. In the first few months, weeds can appear, especially along the edges or in any disturbed spots. Let’s address weed issues in new cool-season sod and how to manage them.
Symptoms: You notice unwanted plants poking through your new grass. Common culprits are crabgrass and other annual grassy weeds (if sod is installed in spring or summer), or broadleaf weeds like dandelions or clover that might come from surrounding areas. Weeds often show up at the seams between sod rolls or at the perimeter of the lawn where the soil was exposed during installation. They can also emerge if the soil brought in weed seeds or if there were dormant seeds that weren’t fully killed during site prep. Crabgrass in particular often appears near driveways or bare patches because it loves heat and open soil. Weeds in new sod are frustrating because you likely just invested in a “perfect” lawn, yet here they are!
Likely Cause: No lawn is an island – weed seeds can blow in from neighboring yards or germinate from the seed bank in your soil. During sod installation, if every last weed and root wasn’t removed or killed, those can regrow. Freshly laid sod doesn’t have a dense root network yet or any residual herbicide, so if conditions are right (warm soil, sunlight, moisture), weeds will germinate. Edges of sod are vulnerable because tiny gaps or disturbed soil invite weed seeds to settle. Also, because you’re watering frequently for the sod, you’re inadvertently watering the weeds too, which encourages their growth. If the sod was laid in late spring, you might be crossing into the summer weed germination period (like crabgrass season) without having had a chance to put down a pre-emergent.
Solutions: Addressing weeds in new sod requires a gentle touch:
- Hand Removal: For the first month or so, the safest method is to manually pull weeds. Do this as soon as you see them, before they establish deep roots. If the sod is very new (under 2 weeks), try not to step on it; instead, you might reach the weeds by standing off the lawn and using a long weeder tool, or by stepping on a board on the sod to distribute weight. Remove the entire weed (roots and all) to reduce regrowth. After pulling, you can sprinkle a bit of topsoil or sand into the tiny hole and gently press the sod back down.
- Spot Treatment (later on): After the sod has been down ~1 month and has been mowed at least 2–3 times, you can use a selective herbicide sparingly. Choose a product that targets the weeds you have (a broadleaf herbicide for dandelions, or a crabgrass post-emergent if it’s crabgrass) and make sure it’s labeled safe for new lawns or the age of your sod. Spot-spray only on the weed patches, not a blanket application. Follow label directions carefully – even at 4–6 weeks old, the lawn is still getting established, so don’t overdose it. If you’re unsure, consulting a lawn care professional for the first treatment might be wise.
- Mowing and Lawn Health: An underrated weed control method is proper mowing and maintenance. Keep your grass a bit on the higher side (3+ inches) especially in summer – taller grass shades the soil, making it harder for weed seeds (like crabgrass) to sprout and thrive. By the time you give your sod its first few mows, maintaining a proper height will naturally suppress some weeds. Also, once your sod is growing well, you can resume normal fertilization (per schedule) which helps the grass fill in thickly and crowd out intruders.
Prevention: It starts even before sod installation:
- Site Prep for Weeds: Remove and kill existing weeds before sodding. This might involve spraying a non-selective herbicide like glyphosate a couple of weeks before you plan to till or strip the old lawn. You can also cover the area with plastic to solarize and kill weeds if you prefer organic methods. The cleaner the soil is when you lay sod, the fewer weed problems you’ll have.
- Edging and Borders: Pay attention to the edges where sod meets flowerbeds, sidewalks, or neighboring weedy areas. You may use strips of sod to overlap those edges or ensure soil is well covered. Applying a light layer of clean straw or mulch at the extreme edge for a few weeks might discourage weed seeds right at the border (just don’t put mulch on the sod itself).
- No Herbicides Immediately: As mentioned, don’t use pre-plant or pre-emergent herbicides just before or right after laying sod unless they are specifically approved for that use (most aren’t, because they could inhibit sod rooting). It’s better to physically remove weeds and then later use pre-emergent products in the next season when the lawn is established. For example, if you sodded in spring and missed spring pre-emergent, plan to apply a pre-emergent next early spring to catch the next cycle of crabgrass (timing around soil temps 50–55 °F).
- Fertilize and Water Correctly: A healthy sod in the long run will outcompete many weeds. Lawns that are under-fertilized or kept too short tend to invite weeds like clover (which likes low nitrogen) or crabgrass (which loves thin turf). Follow a regular feeding schedule after the sod is established – typically a late spring and early fall fertilizer for cool-season grass, and perhaps summer as needed (but avoid heavy feeding in peak heat). Keep the lawn adequately watered once established; drought-stressed thin spots allow weeds in.
- Monitor Constantly: The first 3 months (and really the first year), keep an eye out for any new weed popping up. It’s much easier to pluck one dandelion or a few crabgrass plants early than to deal with a full infestation later. Vigilance in those early stages pays off with a mostly weed-free lawn by the end of the season.
By following these practices, you should find that weed incursions in your new sod are minimal and controllable. Remember, some weeds showing up is normal and not a sign of bad sod – it’s usually environmental. The goal is to tackle them early and help your grass become dense enough to be its own best defense against weeds.
Pest Problems: Insects, Wildlife, and Pets
New sod can sometimes come under attack from pests – both the creepy-crawly kind and four-legged visitors. Since the sod is tender and its roots are shallow, damage from pests can be swift and severe if not checked. Cool-season lawns have their share of insect pests, and a fresh lawn can also attract animals (especially if insects are present). We’ll break this down into insect pests, wildlife issues, and pet-related problems.
Insect Pests in New Sod
Symptoms: Irregular brown patches or chewed-up areas in the sod that appear within the first weeks or months. If you look closely, you might see evidence of insects: for example, grass blades cut off at the crown (could indicate sod webworms or armyworms), or small tunnels at the soil surface (some insects travel that way). You might also notice moths fluttering around the lawn in the evening if sod webworms are present – they are the adult stage of the larvae that eat grass. Another common sign is if the grass lifts easily in pieces and you find white C-shaped grubs in the soil under the sod – that means beetle grubs are eating the roots. Grub-damaged sod often feels not rooted (because the roots are literally gone) and the dead sod peels up like a carpet. Additionally, birds or small animals actively digging in the new sod can be a clue (more on that in the wildlife section) that insects are there.
In cool-season regions, typical insect culprits include white grubs (Japanese beetle or chafer larvae), sod webworms (larvae of lawn moths), armyworms/cutworms, and possibly chinch bugs in hot, dry conditions. Grubs tend to cause damage late summer into fall, webworms and armyworms often strike in summer, and chinch bugs during hot droughts.
Likely Cause: The sod could have come with some insect eggs or larvae in it, or the local insect population finds the new lawn quickly. Sod webworm moths, for example, are attracted to new, lush turf and lay eggs; their larvae can hatch and start chewing patches of grass blades, causing brown patches. White grubs might already be in the soil (if you did not treat for them and the timing coincides with their life cycle) or could have come from the sod farm’s soil. Also, because new sod is watered frequently, it might not have been treated with preventive insecticide (as some established lawns are), so pests can move in unchallenged. In some regions, it’s standard for sod farms to apply an insecticide for webworms prior to harvest, but not always for grubs.
Solutions: For active insect issues:
- Identify the Pest: If you see moths, suspect sod webworms; if you see beetles or found grubs, then grubs are the issue; if it’s just brown patches, you might need to do some digging or nighttime inspecting (webworm larvae feed at night, so come out with a flashlight). Correct identification helps choose the right treatment.
- Insecticide Treatment: Apply an appropriate insecticide labeled for lawn pest control as soon as possible. For sod webworms or armyworms, a lawn insecticide containing ingredients like bifenthrin or permethrin can quickly knock them down. These are often available in liquid hose-end sprays or granular forms. Treat the entire lawn if one area is affected, because larvae can migrate. For white grubs, use a product specifically for grubs – either a fast-acting “24-hour grub killer” (with an active ingredient like trichlorfon or carbaryl) if damage is happening now, or a systemic season-long grub control (imidacloprid or similar) if you want longer protection. Water the lawn after applying granular insecticide to get it into the soil, unless the product says otherwise.
- Natural/Organic Options: If you prefer non-chemical approaches and the infestation isn’t severe, there are some options. For grubs, beneficial nematodes (microscopic worms) can be applied to infect and kill grubs – though results can vary. Milky spore disease is a longer-term biological control specifically for Japanese beetle grubs, but it takes time to establish. For surface caterpillars like webworms, products containing Bt (Bacillus thuringiensis) or spinosad can be effective if caught early, as they are stomach poisons for the larvae. Always apply these at dusk when the larvae are active (and to avoid sunlight degradation of Bt). However, given the investment in new sod, many opt for the quicker chemical control to save the lawn, at least initially.
- Repair Damage: After controlling the pests, you may need to do some lawn repairs. Light insect damage (small chew spots) will often recover on its own with watering and maybe a bit of fertilizer later. Heavy grub damage (if large patches died) might need re-sodding or overseeding in those areas. Wait until you’re sure all pests are gone, then remove dead grass, loosen soil, and patch the area.
Prevention:
- Preemptive Treatment: Some professionals recommend applying preventive treatments soon after installing sod. For example, putting down a preventive grub control (like imidacloprid) in the first month if the timing is right (spring/early summer installs) can stop grubs from later damaging the new roots. Likewise, an application of a broad-spectrum lawn insecticide within the first 7 days can act as insurance against sod webworms and other surface feeders. If the sod farm or installer hasn’t already done this, it’s worth considering, especially in mid-summer sod installations when insect pressure is high. Always follow product guidance about use on new sod (most granular lawn insecticides are fine for new sod).
- Maintain Lawn Health: A well-watered (but not overwatered) lawn can better tolerate some insect feeding. In fact, research indicates that regularly irrigated turf can withstand higher grub populations (20–30 grubs per sq. ft.) without showing damage, whereas drought-stressed turf might brown out with just 5–10 grubs per sq. ft. So keeping your new sod properly watered and fertilized helps it outgrow minor pest issues.
- Monitor and Catch Early: During those first weeks, be on the lookout. If you see moths flying up as you walk the lawn, that’s a hint of sod webworms – you might treat proactively. If birds are pecking a lot at the grass, they may be eating insects, which is a sign to inspect further. In late summer, maybe cut a couple small sample squares of sod and check for grubs underneath (as described by extension services: dig 6-inch squares in a few spots and count grubs). If numbers exceed about 5–10 grubs per square foot, you should treat before they cause serious damage.
- Sod Quality: Purchase sod from reputable farms that have integrated pest management. Many sod growers treat for pests like webworms in advance. While as a consumer you might not control this, knowing the source and if they guarantee pest-free sod can save headaches.
By staying vigilant and possibly using preventive measures, you can usually avoid losing your new lawn to hungry insects.
Wildlife and Animal Damage
Symptoms: You wake up to find strips of your new sod flipped over or torn apart, or small chunks dug out, especially in the morning. There may be shallow holes or rolled-back sections, typically in irregular patterns as if someone randomly pulled at the sod. If you carefully flip back any disturbed pieces, you might find grubs or worms – a clue to who the culprits are. Additionally, you might see paw prints or note that the damage tends to happen overnight. This is a classic sign of raccoons or skunks raiding your lawn. They are often attracted to sod because it’s easy to peel back and may have tasty grubs or insects underneath.
Another form of animal damage is from birds: sometimes crows or other birds peck at new sod, pulling up small pieces or thatch in search of bugs. Bird damage is usually minor (little tufts pulled out) compared to mammals which can peel whole sections.
Aside from wild animals, pets (dogs in particular) can cause issues beyond foot traffic. Dog urine on new sod can create yellow or brown patches due to the high nitrogen content “burning” the grass.
Likely Cause (Wildlife): Raccoons and skunks have learned that freshly laid sod often harbors insects like grubs or worms, and because it’s not yet rooted, it’s like turning over a rug to find a meal. Skunks tend to dig small conical holes, whereas raccoons may actually roll back chunks of sod. If your area has these critters, they can do a number on a new lawn in a single night. The presence of grubs or a lot of earthworms will attract them – so often animal damage is a secondary symptom of an insect problem (they’re after the grubs mostly).
Likely Cause (Pets): Dogs urinating on new sod can cause burn spots – initially, you might see a very green flush (from the nitrogen), but that’s quickly followed by a straw-colored dead patch in the center with a dark green ring around it. This is more noticeable on new sod because the roots are shallow and cannot quickly dilute the urine, and the grass is tender. Also, a big dog running can tear sod, but we covered foot traffic above.
Solutions (Wildlife):
- Protect and Deter: The immediate step is to prevent further damage. If you can, put up some temporary fencing or netting over the sod at night. Even laying something like chicken wire flat on top of the sod (pin it down) overnight can deter animals – they can’t easily roll the sod with wire over it. Just remove it in the morning for aesthetics and water needs. Motion-activated sprinklers or lights can startle nocturnal pests away as well.
- Remove the Food Source: If you find grubs in the flipped sod, treat the lawn for grubs as discussed in the insect section. Reducing the grub population will make your lawn less attractive to diggers. Similarly, if you suspect they’re digging for earthworms or other insects, a general insecticide might help (though you wouldn’t want to kill all worms as they’re beneficial – focus on grubs which are the usual target).
- Repair Sod: Gently flip or put back any sod pieces as soon as possible. If it has dried out or been torn, trim off torn edges and patch them together like a puzzle. Water those areas thoroughly to re-settle them. If some pieces are too damaged, you might need to replace them with fresh sod pieces (your installer or sod farm might have left some extra or you can cut some from an edge).
- Odor Deterrents: Some people report success using natural repellents like predator urine granules, cayenne pepper, or castor oil-based repellents on the lawn to repel skunks and raccoons. These may help, but often only temporarily. If using any, ensure they’re safe for use on lawns and won’t harm the new sod.
Solutions (Pets):
- For dog urine spots: Flush the area with water as soon as possible after the dog goes. This dilutes the urine and can prevent the burn. If spots have already yellowed, water them heavily to wash out salts. Often the grass will regrow if roots weren’t completely killed. If not, you can patch those small spots with a bit of seed or a small sod plug later.
- Designate a potty area: Train the dog to use a specific spot (perhaps an area with mulch or gravel) instead of the lawn. This takes effort but saves the lawn. At minimum, keep the dog off the new sod for a few weeks to allow it to establish – maybe take them for walks or use leashes to direct them elsewhere.
- Consider products: There are lawn-safe treatments or dog supplements that claim to reduce urine burn (some kind of pH-altering biscuits, etc.). Their effectiveness is mixed, but some lawn treatments (soil additives) can help neutralize urine spots if applied regularly.
Prevention:
- Wildlife: If you know your area has skunks/raccoons, pre-treat for grubs when laying sod as a preventative. Also, avoid laying sod at a time when grubs are large and active (late summer) if possible, or be proactive with deterrents from day one. After installation, some installers will staple sod pieces on slopes or edges; this also makes it harder for animals to roll them up. Keep yards clean of attractants: pet food left outside, garbage, etc., can attract raccoons/skunks. Eliminate those lures. Once your sod is established and rooted, the animals can’t roll it back as easily, so your goal is to get through those initial weeks.
- Pets: The best prevention is supervising your pets. For the first month, treat the sod like a fragile carpet – no dogs off-leash on it if possible. Walk them elsewhere. When the lawn is stronger, gradually allow some use but try to water-in their urine spots when you can. You could also train them to go right before irrigation runs, so the sprinkler dilution happens automatically. Ultimately, a well-watered lawn resists urine burns better because the salts are diluted. Some grasses (fescues) have better urine tolerance than others (bluegrass is more sensitive), but in any case, new sod is more sensitive than established turf.
By combining pest control, physical barriers, and good cultural practices, you can protect your new lawn from the local critters. It’s definitely disheartening to see sod torn up overnight, but quick action and prevention will keep such incidents from ruining your investment.
Fungal Diseases in New Sod
Cool-season grasses are unfortunately prone to a variety of fungal diseases, and new sod can be especially susceptible. Why? New sod is kept moist and often laid during warm seasons – exactly the conditions many turf fungi love. Additionally, new sod may experience stress (from transplanting) that lowers its defenses. In the first 3 months, you should be vigilant for signs of lawn diseases and know how to tackle them.
General Symptoms of Disease: Irregular discolored patches, spots on leaves, rings or “smoke rings” of color, fuzzy mold or powder on the grass, or slimy, blackened grass. Unlike drought stress (which is uniform browning from the tips), disease patches often have distinct patterns or margins. A classic telltale: a brown or dead patch with a darker or yellow-ish halo around it suggests active fungus spreading at the edges. You might also see colored growth: e.g., pink or red threads on the grass (from Red Thread disease), orange powder (Rust disease spores on your shoes), or gray/white cobwebby mold in the early morning (from Pythium or dollar spot mycelium). Below we’ll cover the most common diseases in cool-season sod:
Brown Patch (Rhizoctonia solani)
Symptoms: Rough, circular or irregular patches of brown grass, ranging from a few inches to several feet across. The affected grass blades often have a rotted, dark base and you might see a “smoke ring” – a thin dark brown or gray ring at the edge of a patch during early morning when humidity is high. Brown patch thrives in hot, humid conditions, typically night temperatures above ~60–65°F and high humidity. It’s often a summer disease for cool-season lawns (fescue, rye, bluegrass). In new sod, heavy watering and warm nights can trigger it. Grass can look fine one day, then a few days later you see these brown areas.
Likely Cause: Overwatering or watering at night combined with warm, humid weather. New sod that is kept too wet and has dense growth is a prime target. High nitrogen levels can also make grass more susceptible by causing lush, tender growth that the fungus attacks. So if someone fertilized new sod too early or heavily, that can predispose to brown patch. Cool-season grasses like tall fescue and ryegrass are especially known to get brown patch in summer heat.
Solutions:
- Fungicide: At the first sign of brown patch, you can apply a fungicide labeled for Brown Patch (active ingredients like azoxystrobin, propiconazole, or thiophanate-methyl are common). Because it’s a new lawn, choose a systemic, curative fungicide to stop the fungus in its tracks. Follow the label – you may need a couple of treatments 2–3 weeks apart for full control.
- Modify Watering: Immediately adjust watering practices. Water only in the early morning if possible, so the grass isn’t wet for long periods overnight. If you were watering daily still, try to cut back to allow the surface to dry out. Do not water in late afternoon or evening.
- Improve Airflow: If practical, increase sunlight and air circulation (trim any nearby shrubs, etc.) to help grass dry. In the case of sod in a shady area, perhaps run a fan or blower in a pinch (groundskeepers sometimes do this for high-value turf) to dry the canopy after watering – though this is usually not necessary for a home lawn.
- Avoid Nitrogen: Don’t fertilize during an active disease breakout; it can worsen it. In fact, a slight nitrogen deficiency slows brown patch’s spread, whereas high nitrogen feeds the fungus.
With these steps, new sod usually recovers from brown patch once weather conditions improve (cooler, drier air) and proper care is resumed. The affected patches might look ugly for a while, but often the grass isn’t dead – if the crown (base) survived, new leaves will regrow. You can also overseed any truly dead spots in early fall when the disease pressure is gone.
Pythium Blight (Grease Spot)
Symptoms: Small, water-soaked greasy looking spots that can rapidly coalesce into larger streaks of dead grass. Often seen in low areas or spots that stay wet. In the early morning, especially, you might notice a cottony white mold on the grass – this is the mycelium of Pythium and is a diagnostic sign. Pythium blight loves very hot, humid weather (night temps above 70°F, high humidity or prolonged leaf wetness). New sod under frequent irrigation in summer is at high risk. It can literally kill patches of grass in 24–48 hours if unchecked, leaving slimy, matted brown turf.
Likely Cause: Overwatering + heat. Pythium is known as a “water mold,” meaning it thrives in saturated conditions. If you’ve been keeping the lawn too wet and temperatures spike, this disease can strike. Poor drainage or areas where water sits (or if you watered in the evening) can start an outbreak. Also, excessive nitrogen can worsen Pythium, similar to brown patch. Pythium can also come in on sod or be present in the soil waiting for the right conditions.
Solutions:
- Fungicide ASAP: Pythium requires specific fungicides (not all general fungicides cover it). Look for products with active ingredients like mefenoxam, propamocarb, or phosphonates, which are effective against Pythium. It’s critical to treat Pythium immediately upon suspicion, because of how fast it kills turf. If large areas are hit, you might need professional-strength products.
- Dry it out: Stop irrigation immediately for a short period to let the surface dry. You might even use absorptive materials (like fine mulch or calcined clay, if on hand) to soak up excess moisture in small spots, though that’s more of a sports turf trick. The point is to break the continuous wet conditions.
- Improve Drainage: If you identify that a particular spot is always wet, take steps to improve it – maybe push a screwdriver in to create temporary drainage holes or, once dry, topdress with a bit of sand to help water move.
- Quarantine: Pythium can spread via water and even mowing equipment. Avoid moving infected clippings around. Clean your mower if you’ve mowed diseased areas (though you likely shouldn’t mow a diseased lawn until under control).
New sod that gets Pythium may suffer some real loss. You might have to rake out dead thatch and resod or reseed areas later. The key is preventing it through watering management and being alert during extreme weather.
Dollar Spot
Symptoms: Numerous small, round straw-colored spots about the size of a silver dollar (2–3 inches). They can merge into bigger patches if severe. Often you’ll see them in the morning with dew: there might be a cobwebby mycelium on them (though less dense than Pythium’s). The spots have a tan/beige appearance with reddish-brown borders on the individual grass blades if you inspect closely. Dollar spot tends to appear in warm days, cool nights, and with dew on the grass – late spring or early summer and again in early fall are common times. It’s typically associated with low fertility; new sod that hasn’t been fertilized in a while or is on poor soil might be susceptible.
Likely Cause: Under-fertilization and consistent dew. If your new sod is going a bit hungry (maybe you waited the correct time to fertilize but haven’t yet, and the soil was low in nitrogen), dollar spot could pop up. Also, watering too lightly can create constant dampness that favors it, as can infrequent watering that leads to dew every morning. Dollar spot fungi are active when grass stays wet for 8+ hours and soil is on the drier side with low nitrogen.
Solutions:
- Fertilize: Often the first recommendation for dollar spot on a cool-season lawn is to apply nitrogen fertilizer. Bringing the lawn’s fertility up can make the grass outgrow the disease and also directly suppress disease activity. So if your sod is ~4+ weeks old and you see dollar spot, it might actually be a sign it’s time for that first feeding. Apply a balanced lawn fertilizer, or something with a bit more nitrogen if your soil test suggests it, at the normal rate.
- Mow and Water Correctly: Remove clippings if dollar spot is active (to reduce spreading spores, though clippings are less of an issue than with some diseases). Water deeply in the morning rather than shallow watering or late watering – you want to avoid long dew periods. If dew is present, a light misting in early morning or dragging a hose across the lawn can knock off dew and dry the grass faster, which helps stop the fungus.
- Fungicide (if needed): There are fungicides that control dollar spot as well (many general lawn fungicides list it). If it’s spreading or you want a quick fix, you can apply one. But often, improving nutrition is enough for mild cases.
Prevention: Maintain adequate fertility in your new sod after the initial no-fertilizer period. Most sod farms fertilize sod before harvest, so the sod might not need fertilizer for the first 3–4 weeks. But after that, it’s good to feed it. A lawn with good nutrition is much less likely to suffer dollar spot. Also, avoid nighttime watering and try to reduce leaf wetness duration. If you historically have dollar spot in your area, some people do a preventative fungicide in late spring on new lawns – though this is usually not necessary if you feed properly.
Red Thread & Pink Patch
Symptoms: Patches of grass (often 4–8 inches across) that have a pink or reddish tint. On closer inspection, especially in humid weather or after rain, you’ll see pink, gelatinous or thread-like fungal growth on the grass blades – literally looks like pink threads or cotton candy bits clinging to blades. The grass in these patches may die back or just look scorched. Red Thread commonly affects cool-season grasses (like fine fescue, ryegrass) when they are under nitrogen stress and in cool, damp weather (often spring or fall). New sod in the cooler months that hasn’t been fed might get this. It’s more cosmetic than destructive usually.
Likely Cause: Nutrient deficiency (low nitrogen) combined with prolonged humidity or light rain periods. If your sod was laid late in the season and you didn’t fertilize yet, or on poor soil, it could show red thread. Lawns with red thread typically are hungry – the fungus doesn’t actually kill the grass roots, it feeds on the tissue, especially when growth is slow due to lack of nutrients.
Solutions:
- Fertilize: Like dollar spot, the primary fix is to fertilize the lawn. Once the grass gets a dose of nitrogen, it usually recovers and outgrows the red thread. You’ll see new green growth replace the tan/red-tinged old leaves.
- Mow and Cleanup: You can mow the patches and bag the clippings to remove the infected blades (reduces spore spread, though red thread can blow in from anywhere really). Removing the pink mycelium-laden clippings might slightly help curb it.
- Fungicide (optional): Red thread is mostly a cosmetic disease and typically goes away after fertilization and when weather warms up. Fungicides are available (some products cover it), but most turf managers don’t treat red thread specifically unless it’s severe, since fertilization is enough.
Prevention: Ensure your new sod gets a balanced feeding regimen. Also, varieties of grass differ in susceptibility – many modern grass cultivars have some resistance. If you have a perennial rye or fescue sod, know that red thread can happen if the lawn is starved of nitrogen or in cool damp spells; plan to fertilize appropriately. Keeping the lawn at the proper mowing height and raking out thick thatch (not usually an issue in “new” sod) can also help in the long term. But red thread is usually a minor blip.
Powdery Mildew
Symptoms: Patches of grass (often in shady, low-airflow areas) have a white or grayish powdery coating on the blades, like someone sprinkled talcum powder or flour on the grass. The grass may look pale or stunted underneath. Powdery mildew on turf often appears in cool, moist, shady conditions, such as the north side of a house or under trees in spring/fall.
Likely Cause: Shade and poor air circulation. If part of your new sod is in a shaded zone that doesn’t get much direct sun, it might develop powdery mildew. Overwatering or frequent irrigation that keeps humidity high around the grass can contribute. Cool-season grasses like Kentucky bluegrass are known to get powdery mildew in shade. New sod might show this if suddenly it has to live in a shadier spot than it was grown in (sod is often grown in full sun at the farm).
Solutions:
- Increase Light/Air: If possible, prune back some branches or reduce the shade in that area. Even a bit more sun or breeze can greatly reduce mildew.
- Water Less Frequently: Since shade makes water evaporate slower, you might need to water those areas less often than the rest of the lawn. Avoid wetting the foliage in late afternoon in shade.
- Fungicides: There are fungicides for powdery mildew (e.g., products containing propiconazole or chlorothalonil can work). But often, cultural control is preferable since powdery mildew usually doesn’t destroy a lawn, it just weakens it. If it’s a small area, you might ignore it and it could go away when weather changes (hotter/drier usually stops it).
- Shade-Tolerant Grass: In extreme cases, if that area is very shady and consistently gets mildew, consider overseeding with a more shade-tolerant grass variety (fine fescue, for example) next season. But that’s a longer-term strategy.
Prevention: Plan your sod and landscape such that grass is not in full shade if you can help it. If you have to have grass there, accept that it will need different care – less water, and possibly more monitoring for diseases. Planting shade-tolerant grass types in those sections can help (fine fescues resist mildew better than Kentucky bluegrass, for instance). Also, ensure not to over-fertilize shaded grass; it doesn’t use as much nitrogen (and too much can make mildew worse). Light, regular pruning of landscaping to keep air flow can prevent that stagnant moist air that mildew loves.
General Disease Prevention Tips
- Water Timing: Water in the morning to limit leaf wetness overnight. Most fungal diseases require hours of leaf wetness to infect, so a dry night keeps them at bay.
- Proper Drainage: We’ve stressed this, but puddles or constantly soggy spots will breed disease. Correct grading issues or adjust sprinklers to avoid over-saturating one area.
- Moderate Fertilization: Follow recommended fertilizing schedules – too little can invite diseases like dollar spot and red thread, too much (especially nitrogen) can spur brown patch and Pythium. New sod typically needs its first feeding about 3–4 weeks in, and then periodically (e.g., 6–8 weeks later) depending on season. Use slow-release nitrogen sources for steady feeding rather than dumping quick-release all at once.
- Air Flow: If you have the ability, temporarily increasing airflow can help new sod in humid conditions. For instance, a fan on a porch aimed at a stubborn shady corner in the evenings can dry it out. Not always practical, but worth noting.
- Preventive Fungicides: If you know conditions are ripe for disease (say you laid sod in July, it’s hot and you’re watering a lot), some professionals apply a preventive fungicide within the first week of installation. This can suppress fungus before it gets a foothold. Commonly, something like azoxystrobin or propiconazole is used preventatively. This is optional, but in high-risk times it can save your lawn. Always use fungicides according to label and consider rotating chemistries if you have to reapply (to avoid resistance).
- Monitoring: Early signs of disease can be subtle – a slight color change, a small spot. Catching it early means a small fungicide application or minor adjustments can halt it, versus a full-blown epidemic. So walk your lawn regularly (which you likely do when it’s new and exciting!). If you see something suspicious, investigate closely: look at the blades, feel the soil, maybe take a picture and compare to known disease symptoms or ask an expert. It’s much easier to treat a 6-inch patch of brown patch than your entire yard once it’s spread.
By respecting the environmental conditions that cause diseases and responding promptly, you can manage these fungal threats. Remember, in many cases if your sod does suffer disease damage, it’s not the end of the world – improve the conditions and the turf often grows back. Patience and good care will nurse the lawn through.
Environmental and Seasonal Stresses
Aside from the above categories, there are a few other issues related to environment or season that can affect new sod:
- Heat Stress and Summer Dormancy: Cool-season grasses struggle in extreme heat. If you lay sod in summer, even with good watering, the grass may wilt in midday sun or even go slightly dormant (some varieties of bluegrass might brown a bit in intense heat to protect themselves). You might see the lawn looking peaked in the afternoon but recovering by morning. The key here is to keep up with water, possibly water lightly to cool the grass (syringing) during a heatwave, and know that once temperatures drop, the grass will bounce back. Providing brief shade (portable canopy or shade cloth) for a new sod area during a 100°F heatwave midday is something hardcore enthusiasts might do – but generally, just water more frequently in extreme heat. According to sod experts, you can lay sod in summer, but it requires “extra vigilance” with watering, sometimes even twice a day in the first week. The trade-off is that warm soil actually encourages rooting if you can keep the grass alive and hydrated.
- Cold Weather and Frost: Laying sod late in fall is common for cool-season turf. The sod will not grow much until spring, but the roots can still slowly knit in as long as the ground isn’t frozen. If your sod was installed and then a hard frost or early snow hits, the grass might go dormant (turn brownish) over winter. That’s okay – cool-season sod often survives winter dormancy and greens up in spring. The concern is if the sod was not sufficiently watered before the ground froze: winter desiccation can kill turf. So if you’re going into winter within the first 3 months of sod, make sure to water until the ground freezes so the sod has moisture. Also avoid heavy traffic on frozen new sod, as it can break the tender roots. Snow mold (a disease) might appear as snow melts, especially if the grass was left a bit long; it shows up as matted, crusty patches. If that happens, just rake the area lightly and most times the grass recovers as weather warms. Typically no chemical is needed for snow mold on home lawns unless it was severe.
- Shade and Sun Transition: If part of your sod is in shade and part in full sun, you might see differences in performance. Shady areas may stay wetter and get fungus (like powdery mildew, as noted) or grow thinner due to less light. You may need to water the sunny parts more and the shady parts less – treat micro-environments appropriately. Also, consider future tree shade: as leaves come in spring (if you laid sod in early spring before trees leafed out), an area might suddenly get much shadier and the sod might thin. In deep shade, grass might gradually thin out. Solutions include pruning trees or overseeding with shade-tolerant grasses.
- Slope and Erosion: If you sodded a slope and got a heavy rain, sometimes new sod can slide or erode if not well pinned. That’s more of a mechanical failure than a natural problem, but be mindful. Use sod stakes on inclines and don’t overwater to the point of runoff on slopes. If a washout happens, you’ll need to realign and secure the sod pieces and maybe add soil to eroded spots.
- Soil pH or Chemistry Issues: Not as immediately obvious, but if the soil under sod has an extreme pH or lacks certain nutrients (like iron), you could see symptoms like chlorosis (yellowing from iron deficiency, common in high pH soils) or just poor growth. This is where a soil test is valuable. If your sod is yellowing despite proper watering and no apparent disease, it could be a nutrient or pH problem. For example, high pH can lock up iron, causing grass to yellow (especially in new construction areas with alkaline soils or where concrete leached lime). The fix could be applying chelated iron for quick greening, and long term adjusting pH with sulfur. Or if phosphorus was extremely low and the sod wasn’t fertilized, you might see purplish or thin grass – a starter fertilizer would help. While these aren’t exactly “new sod problems” in the sense of being caused by installation, they can coincide with new sod if soil prep didn’t account for them.
- Thatch Layer or Netting in Sod: Some sod comes with netting (biodegradable) to hold it together. Occasionally, this netting can get exposed if the sod thins or if seams separate. It’s usually not a big issue, as the net will break down over time, but avoid pulling it out too early or you might pull up the sod. Just be aware of it if you see plastic or mesh showing – it’s normal. If it’s the black plastic kind and bothersome, you can cut and remove small sections once the grass is rooted well. As for thatch, some sod has a bit of a thatch layer (old organic matter) – heavy thatch could hinder rooting if extreme. If you feel that’s an issue, topdressing and keeping soil moist can encourage decomposition. It’s rarely a major problem in the first 3 months though.
Putting It All Together: Best Practices for New Sod Health
To wrap up, here’s a consolidated checklist of preventative measures and care tips to avoid the myriad of problems we’ve discussed:
- Soil Preparation: Ensure the soil is loose, fertile, well-draining, and weed-free before sod installation. Correct pH and nutrient deficiencies in advance.
- Immediate Action at Installation: Lay sod promptly on delivery, fit pieces tightly, eliminate air pockets (rolling is a must). Water thoroughly right after installation.
- Watering Regimen: Keep sod moist daily for the first ~10–14 days, then gradually transition to deeper, less frequent watering. Avoid overwatering – let the surface dry out between waterings as you go into weeks 3–4. Always water in the morning to minimize disease risk.
- Monitoring Moisture: Check under the sod regularly. Corners and edges dry out first – hand-water these if necessary. Watch for runoff or puddling which indicate overwatering or uneven ground.
- Limited Traffic: Keep people and pets off the new sod for at least 2 weeks (preferably 3 weeks if you can). Use temporary barriers or gentle reminders. This prevents compaction and displacement of sod.
- Mowing Guidelines: Wait until the grass is ~3–4 inches tall and the sod has begun to anchor (10–14 days or more) before the first mow. Mow high (leave grass tall) and with a sharp blade. Never cut more than 1/3 of the blade. If in doubt, wait a few extra days rather than mowing too soon.
- Fertilizing Schedule: Do not fertilize in the first 2–3 weeks unless instructed by your sod farm (most say not to). Around 4 weeks in, apply a starter fertilizer or balanced slow-release fertilizer to feed the lawn. Follow up with another feeding in another 4–6 weeks if it’s the growing season. Avoid high-nitrogen quick-release fertilizers early on.
- Weed Control: Do not use herbicides for at least 1 month. Hand-pull any weeds that appear. Keep grass taller to shade out weeds. Once established, use targeted post-emergents if needed and consider a pre-emergent at the appropriate time next season to prevent annual weeds like crabgrass.
- Pest Prevention: Consider applying a preventative grub control within a month if grubs are common in your area (usually summertime). Keep an eye out for signs of surface insects (webworm moths, etc.) especially in summer; treat promptly if seen. If you live in a region with a history of armyworm outbreaks, for instance, stay alert during those peak times (late summer) even within the first months.
- Wildlife Management: Use deterrents or temporary barriers at night if critters are a problem. Treating for grubs also deters the grub-hunters like skunks. Clean up attractants around the yard.
- Disease Prevention: Follow proper watering and mowing as your first line of defense. In high disease risk periods (hot and humid), you can do a preventative fungicide application. At minimum, be ready to act at first sign of disease – keep a lawn fungicide on hand if your area is known for outbreaks (like brown patch in July). Adjust practices to mitigate disease: e.g., water less at night, increase airflow if possible, and hold off fertilizer if disease is active. Remember not to over-fertilize or underwater the lawn, as both can lead to disease conditions.
- Seasonal Adjustments: If laying sod in summer, be extra vigilant with water and consider morning and midday light mistings to cool grass in extreme heat (syringing). If laying in late fall, water until frost and don’t panic if it goes dormant brown – just resume care in spring. Rake leaves off new sod in fall; don’t let piles of leaves smother it.
- Patience and Observation: Perhaps the most important tip – watch your new lawn closely. Small problems are easiest to fix. The grass will “tell you” if it’s happy (staying green, growing) or stressed (color changes, wilting, spots). By catching issues early, you can apply the specific solution from this guide before it becomes a big issue. Within 3 months, most new sod lawns have deepened their roots, been mowed several times, and are on their way to maturity.
Finally, remember that new sod establishment is a dynamic process. There may be a few bumps along the way, but armed with this knowledge, you can tackle each problem confidently. Even turf professionals deal with these same issues on sports fields and golf courses – the difference is they anticipate them and respond quickly. Now you can too. With diligent care in those first 3 months, your cool-season lawn will be well on its way to a beautiful, healthy expanse of green that will last for years. Enjoy your new lawn, and don’t hesitate to refer back to this guide whenever you spot something unusual. Happy growing!
Sources
- Turf Master Sod Farm – Common Sod Problems & Solutions (2020) (turfmastersodfarm.com)
- Ground Source Landscaping – My New Sod is Turning Brown: 5 Causes and Solutions (2021) (groundsource.pro)
- The Turfgrass Group – Caring for New Sod: 8 Mistakes to Avoid in the First 30 Days (2025) (theturfgrassgroup.com)
- Sodding Canada – How to Prevent Disease in New Sod Lawns (2025) (sodding.ca)
- Turf Master Sod Farm – Protecting Your New Sod Against Crabgrass (2020) (turfmastersodfarm.com)
- Turf Master Sod Farm – The Sod Is Installed – What’s Next? (2021) (turfmastersodfarm.com)
- Michigan State University Extension – White Grubs in New Sod: What Do I Do? (2016) (canr.msu.edu)
Ready To Order?
Fresh-Cut Sod Delivered
CT Sod delivers Kentucky Bluegrass, Tall Fescue & RTF sod across CT, MA, NY, NJ, RI, NH, VT & ME.
Keep Reading
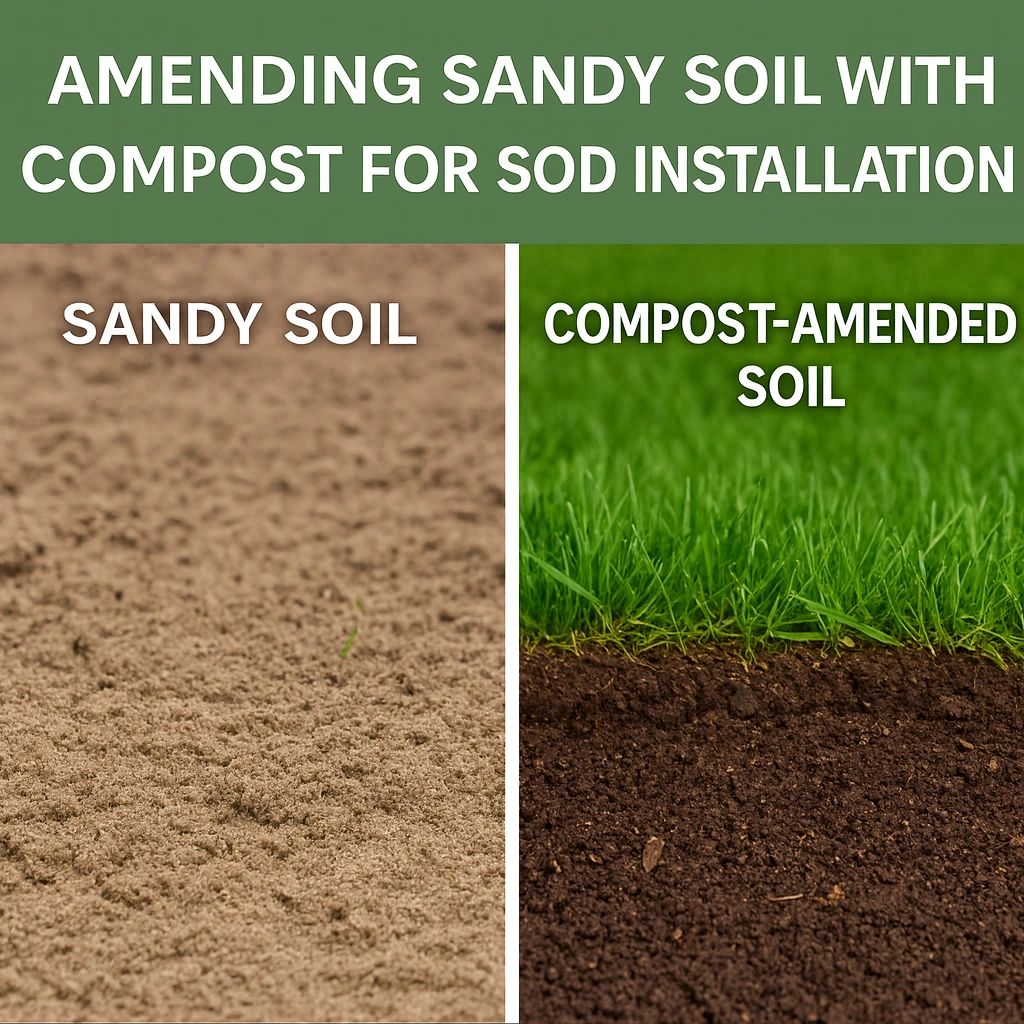
Amending Sandy Soil with Compost for Sod Installation CT, NY, MA
August 25, 2025
April Lawn Care Tips for a Lush New England Yard
April 1, 2025

Best Drought-Tolerant Sod Varieties: Northeast Guide
April 30, 2026

Best Sod for Connecticut Lawns: Complete Regional Guide
April 28, 2026