Installing sod is the fastest way to transform bare soil into a beautiful lawn. Whether you’re a homeowner dreaming of instant green grass or a landscaper looking for reliable results, proper sod installation is key to success. This comprehensive guide will walk you through when to choose sod over seeding, how to prepare your ground, the step-by-step process of laying sod, and the crucial after-care like watering, mowing, and fertilizing. We’ll also cover common mistakes to avoid and long-term care tips to keep your new sod healthy. By following these professional but accessible tips, you can achieve a lush lawn that adds value and curb appeal to your home.
When and Why to Choose Sod Over Seeding
Both sod and grass seed can establish a lawn, but sod offers some distinct advantages that often make it the preferred choice:
- Instant Results: Sod provides an “instant lawn.” The moment it’s installed, you have a green, intact lawn surface. In contrast, seeded lawns can take 2–3 months (or an entire growing season) to fill in and become usable. If you want a near-immediate transformation or need grass coverage quickly (for example, to prevent erosion on a slope or comply with landscaping requirements), sod is the way to go.
- Reliable Establishment: When installed correctly, sod typically roots and becomes established within 2–3 weeks, allowing for normal foot traffic soon after. Seeded lawns are vulnerable in the early weeks—heavy rain can wash seed away, and young seedlings are delicate. Sod comes as mature turf, so it’s less prone to weed invasion and soil erosion during establishment. It also arrives weed-free (if you buy quality sod), whereas seeds can face competition from weeds as they grow.
- Flexible Timing: Seeding is season-dependent; for cool-season grasses (like fescue or Kentucky bluegrass), the best time to seed is usually early fall or spring, and for warm-season grasses (like bermuda or zoysia), late spring. Outside those windows, seeding success drops. Sod, however, can be laid almost any time during the growing season as long as the ground isn’t frozen. If you missed the ideal seeding time or need a lawn during summer, sod gives you that flexibility (just be prepared to water more in hot weather).
- Initial Maintenance: A newly sodded lawn does require diligent watering, but it generally needs less immediate pampering than seed. You won’t have to tiptoe around mud or keep straw blankets in place. Sod’s dense coverage also means you won’t have patchy areas (as long as you install it properly). With seed, you might be reseeding thin spots and dealing with mud for weeks. Sod lets you skip ahead to a mature lawn look.
Keep in mind that sod typically costs more upfront than seed (you’re paying for the sod farmer’s time and labor to grow and harvest it). It’s also more labor-intensive to install heavy rolls of sod. However, if your budget allows and you value quick results and reliability, sod installation can save time and yield a ready-to-use lawn much faster than seeding. On the other hand, if cost is a major concern and you don’t mind waiting and nurturing grass from seed, seeding might be acceptable. In summary, choose sod when you want an instant lawn, need erosion control, or can’t afford the risks or timing issues of seeding – and be ready to care for it properly to protect your investment.
Pre-Installation Ground Preparation
Proper ground preparation is absolutely critical for successful sod installation. Think of it as laying the foundation for your new lawn – the better the prep, the better the sod will root and thrive. Here are the key steps to prepare your soil before any sod goes down:
1. Clear Existing Vegetation and Debris: Start with a clean slate. Remove any old grass, weeds, or plants in the area. You may need to use a sod cutter or shovel to strip away old turf. Alternatively, spraying a non-selective herbicide a couple of weeks in advance can kill existing growth (just be sure to follow safety guidelines and allow enough time for the chemical to dissipate before laying sod). Rake up dead vegetation, and clear away any rocks, roots, wood, or construction debris. Aim to remove anything larger than about 2–3 inches in size from the topsoil. This step ensures nothing will interfere with the new sod’s contact with the soil.
2. Test and Amend the Soil: Testing your soil will reveal its pH level and nutrient content, which is valuable for a healthy lawn. Most turf grasses prefer slightly acidic to neutral soil (around pH 6.0 to 7.0). You can buy an inexpensive soil test kit or send a sample to your local Cooperative Extension office for a detailed analysis. If the pH is too low (acidic), you may need to mix in lime; if it’s too high (alkaline), sulfur or gypsum can help. Also take note of nutrient levels – the test might recommend adding fertilizer or organic matter. It’s much easier to incorporate lime, fertilizer (especially phosphorus for root development), or compost before the sod is laid. Spread any recommended soil amendments now and they’ll get blended in during the next steps.
3. Grade and Drain: Proper grading is important so that water doesn’t pool on your lawn or around your house. Rough grade the area by filling low spots and leveling high spots. Ensure the ground slopes gently away from foundations to direct water runoff appropriately. A general guideline is a slope of about 1–2% (i.e. a drop of 1–2 feet per 100 feet) sloping away from structures. Use a rake, shovel, and wheelbarrow for small areas, or a tractor with a box blade for larger lawns. As you grade, remove any additional stones or debris you uncover. The goal is a smooth, even contour free of large bumps or holes. This will also make mowing easier and prevent water from collecting in dips.
4. Loosen the Soil (Till): Once rough grading is done, loosen the topsoil to promote good root penetration. Use a rototiller or garden fork to till the soil to about 4–6 inches deep. Tilling breaks up compacted soil and creates a friable surface for new roots to grow into. It also helps mix in your soil amendments from Step 2. If you plan to add fresh topsoil or compost, you can do a lighter initial till (about 2 inches deep), then spread the new topsoil/compost, and till again to incorporate it. Tip: Avoid tilling soil that is overly wet, as that can destroy soil structure – the dirt should be moderately moist, like a wrung-out sponge, when tilling.
5. Add Topsoil or Compost (If Needed): Ideal topsoil depth for a lawn is around 4–6 inches of good quality soil. If your site has only a thin layer of topsoil or poor soil (sandy or heavy clay), consider importing some nutrient-rich topsoil or compost and spreading it over the area. Compost can improve soil structure and provide slow-release nutrients. After adding, rake it out evenly. If you added a significant amount (say more than a couple of inches), it’s wise to lightly till or mix the new material with the native soil below so you don’t end up with distinct layers (roots can have trouble crossing sharp soil-layer boundaries). This will ensure the sod’s roots can penetrate deeply and not just sit on top of a hard subsoil layer.
6. Finish Grade and Firm the Soil: Do a final pass to fine-grade the surface. Use a steel rake to break up clods and create a smooth, even surface. The final soil level should be about 1 inch below driveways, sidewalks, and walkways – this drop allows the thickness of the sod to end up flush with those surfaces once laid. If you have sprinkler heads or other fixtures, make sure the soil grade accounts for the sod thickness so they won’t be buried or too low. It’s often helpful to lightly roll the area with a lawn roller (half-filled with water for some weight) to firm the soil and reveal any soft spots or low areas. Fill any depressions as needed and re-roll. The soil should be firm enough that walking on it leaves only shallow footprints, but not compacted like concrete. A slightly firm, level surface ensures good sod-to-soil contact.
7. Pre-Sod Watering (Moisten the Soil): Water the prepared soil lightly a day or hours before sod installation. The soil should be moist (not soaking muddy) when sod is laid on it. Having moisture in the soil helps encourage the sod’s roots to start growing downward and prevents the dry soil from drawing moisture out of the sod too quickly. If the ground is dry, a light watering will cool the soil and provide a welcoming environment for the new turf. That said, avoid over-watering to the point of puddles or mud, as it will be messy to work in and could lead to air pockets under the sod.
Summary: Spend the bulk of your effort on preparation – clearing debris, testing and amending soil, grading, and leveling. This groundwork sets the stage for your sod’s success. Skipping these steps or doing a rush job can result in sod that doesn’t root well, grows unevenly, or develops problems later (like bumps, low spots, or poor drainage). A well-prepared site will reward you with a healthier lawn that takes root quickly and stands the test of time.
Sod Installation Steps: Laying Your Sod Correctly
With the site prepped and your fresh sod on hand, it’s time to lay the sod. Sod installation is a straightforward process, but technique matters. Follow these step-by-step instructions for best results:
1. Measure Your Lawn and Order Enough Sod: Before you even get the sod, measure the area of your lawn (length × width for rectangular sections, or use an online sod calculator for irregular shapes) to know how many square feet of sod you need. Sod is typically sold by the square foot (often in rolls or pieces that are about 2 feet by 5 feet, but sizes vary). It’s wise to order 5–10% extra sod to account for cutting and shaping pieces. Having a little extra ensures you don’t come up short and have to rush out for more (sods from different sources or batches might not match exactly in texture or color). Plan to have the sod delivered on the day of installation (or the evening before) – fresh sod is perishable and should be laid within 24–48 hours of harvest for best results. When the sod arrives, keep it in the shade and lightly sprinkle water on the pallets if you can’t start immediately, to prevent it from drying out.
2. Start at a Straight Edge: Begin laying sod along the longest straight edge of your lawn. Good starting points are along a driveway, sidewalk, patio, or a fence line. Unroll or place the first row of sod pieces tightly along that edge. A straight starting row makes it easier to keep subsequent rows aligned and looking neat. As you lay each piece, make sure it is flat with no wrinkles or air pockets underneath. You can gently tamp it down with your hands or the back of a rake. Avoid stepping directly on the sod you’ve just laid; if you need to work on it, stand on a piece of plywood or an old board to distribute your weight and prevent indentations.
3. Lay Sod in a Brick Pattern (Stagger the Seams): On the next row, offset or stagger the sod pieces so that the seams do not line up with the seams of the row you just laid. This is similar to how bricks are laid in a wall. Staggering seams helps the pieces knit together more seamlessly and prevents long straight lines of joints, which can dry out or come apart. It also makes the lawn more uniform and less prone to having visible lines. As you place each piece, push it tightly against the neighboring pieces so the edges abut with no gaps. Gaps can dry out the sod edges and invite weeds or disease. If a piece is not fitting nicely at the end of a row, use a knife to trim it rather than leaving a large gap or overlapping (more on trimming in a moment).
4. Butt the Pieces Tightly (No Overlap or Gaps): Each sod strip should fit snugly against the next. Do not overlap pieces (overlapping creates an uneven surface and those areas won’t root properly). At the same time, avoid stretching or pulling the sod too much – sod can tear. Just lay each piece gently in place and nudge it against its neighbor. The edges should be touching each other without significant space. If small gaps occur (sometimes sod can shrink a bit on hot days), you can fill them with a bit of loose soil to prevent edges from drying. Keeping edges tight also ensures the roots from one piece can grow into the soil right next to its neighbor, forming a continuous root system.
5. Keep Sod Moist as You Go: As you lay sod, it’s crucial not to let it dry out. If you’re working on a large area on a sunny or hot day, consider watering sections of the sod you’ve laid immediately while you continue working on the rest. A good rule of thumb is to begin watering within 30 minutes of laying a section of sod. Fresh sod has living grass that can dry and wilt quickly, especially the exposed roots on the bottom. You might lay a few rows and then pause to water them lightly, ensuring the sod is getting moisture. Another tactic is to dampen the soil lightly right before laying each piece. The goal is to maintain contact between moist soil and moist sod. Never let laid sod sit for hours in the sun without water. It can die or go into shock, risking the success of your new lawn.
6. Cut and Fit Sod Pieces as Needed: You’ll likely need to cut sod to fit around curves, planter beds, sidewalks, trees, or sprinkler heads. Use a sharp utility knife, landscaping knife, or even old serrated kitchen knife to cut the sod from its underside (soil side). Measure the area that needs the custom piece, cut the sod piece to size, and lay it in place. For irregular edges or curved borders, let the sod overlap the border and then use your knife to trim off the excess following the curve of your edging. For obstacles like sprinkler heads, cut an “X” in the sod piece where the head will go, lay the sod down, then trim the flaps to make a clean hole. It’s better to cut a slightly larger piece and trim it down than to cut too small and have a gap. Always place freshly cut edges against solid edges (like another piece of sod or a hard border) rather than leaving a lone cut edge exposed (exposed edges dry out faster).
7. Press Down the Sod for Good Contact: After laying a few rolls or once you finish the entire area, you need to ensure the sod is well-contacted with the soil beneath. You can do this in a couple of ways. The professional method is to use a lawn roller (a heavy cylinder you can fill with water) and gently roll over the sod. This presses the sod roots into the soil and removes air pockets underneath. If a roller isn’t available, an alternative is to use a large flat board or piece of plywood: lay it on the sod and walk on it to push the sod down evenly. Some people also simply walk on the sod with flat-soled shoes in a shuffling manner to press it down, but be cautious not to pull or shift the sod pieces. Rolling or tamping the sod is especially important if the ground was a bit fluffy or if the sod isn’t perfectly flat – it helps even out any minor bumps and ensures every bit of root has soil contact. Note: If the ground is extremely wet or muddy (like after a heavy rain during installation), skip the rolling step to avoid shifting the sod or compacting overly soggy soil.
8. Water Thoroughly and Immediately: Once you have a significant section laid (and certainly right after finishing the entire lawn), water the new sod deeply. Ideally, you should water all the new sod within 30 minutes of laying the last roll. The first watering needs to drench the sod and the top few inches of soil beneath it. This usually means applying about 1 inch of water or enough that when you peel back a corner of a sod piece, the ground underneath is very moist (but not sitting in a puddle). Watering immediately is critical to saturate the roots and help the sod recover from the stress of harvest and installation. If you have an irrigation system, turn it on to water the new lawn evenly. If using portable sprinklers, move them around to cover all areas. Watch for water running off — if the ground was dry it might initially repel water; in that case, stop watering briefly to let it soak in, then resume. The sod and soil should be uniformly wet after this first irrigation.
By following these steps, you’ll have successfully installed your sod. You should now be looking at a lovely green lawn, but your job isn’t done yet! Proper care in the next few weeks is absolutely vital to ensure the sod establishes a deep root system in its new home. Treat the freshly laid sod gently — avoid heavy foot traffic or placing heavy objects on it for a couple of weeks. Now let’s move on to how to water, mow, and maintain your new lawn during this crucial establishment period.
Watering Schedule for the First Few Weeks
Watering is the single most important task after laying new sod. New sod must be kept moist in its early weeks as it begins to send roots into the soil. If it dries out, the sod can shrink, brown, or even die before it roots. On the other hand, overwatering can suffocate roots or promote disease. Striking the right balance is key. Here’s a general watering schedule to follow for a typical new sod installation:
- Day 0 – Installation Day: As noted, water the sod immediately after installation, giving it a good soak. The soil beneath the sod should be moist to a depth of a few inches. This initial watering is critical to settle the sod in and alleviate transplant shock.
- Week 1 (Days 1–7): Keep the sod and the soil underneath constantly moist but not submerged in standing water. This usually means watering daily, and in hot or dry weather, you might need to water twice a day (morning and late afternoon). Morning watering is ideal because it gives the lawn a supply of water for the day’s heat and reduces evaporation loss. Aim to apply enough water to keep that top 1 inch of soil wet at all times. You can check by lifting a corner of sod or pushing a screwdriver into the ground – if it comes out dry, it’s time to water. Be careful not to create mud or puddles; you want deep moisture, not a swamp. If footprints in the sod are very squishy or water pools in areas, cut back the duration of watering a bit. Important: Avoid watering in the evening or at night during this first week (and generally), as water sitting on the grass overnight can encourage fungal diseases.
- Week 2 (Days 8–14): Now that the sod has had a week of constant moisture, it should be beginning to knit into the soil. In the second week, you can start spacing out the waterings a bit to encourage the roots to grow deeper in search of water. You might water once every other day instead of every day, depending on weather. If the weather is very hot or the sod still seems to dry out quickly, continue daily watering, but generally you can taper to 4–5 times this week. When you do water, still water deeply. It’s actually better at this stage to water a bit heavier with a day off in between rather than a light sprinkle every day. Deeper, less frequent watering will train the young roots to grow downward. Continue to check under sod pieces for moisture. The sod should still be kept moist, but you can allow the surface of the soil to dry out just a little between waterings now.
- Week 3 (Days 15–21): By the third week, your sod should be rooting in nicely. You can typically reduce watering to about 2–3 times during the week. For example, you might water deeply on Monday, Wednesday, and Friday (skipping if there’s significant rainfall). When you water, do it thoroughly so that the moisture penetrates several inches into the soil. By now, you don’t want the surface constantly wet, because you want those roots hunting for water deeper down – this results in a stronger, drought-resistant lawn. The grass will tell you if it needs water: watch for slight wilting, or the blades starting to curl or turn a bit dull-colored – that’s a sign it’s getting thirsty between scheduled waterings and you should irrigate. But if the grass still looks lush, you’re on track.
- Week 4 and Beyond: Around 3 to 4 weeks after installation, most sod lawns have established enough roots that you can transition to a regular watering routine suitable for an established lawn. Typically, established turf needs about 1 inch of water per week (from irrigation or rain) to stay healthy. It’s best to deliver that in one to two deep waterings per week rather than daily shallow watering. Deep watering encourages deeper roots, making the lawn more resilient. However, remember this is a gradual transition – if you’re in hot summer and week 4 is blazing hot, you might still water more frequently and taper off when weather moderates. As a long-term practice, watering in the early morning is best, and avoid nighttime watering. Also, keep an eye on the edges of the sod and areas near sidewalks or driveways; these spots can dry out faster (the pavement heat can cause more evaporation), so sometimes they need a little extra water or attention.
Additional Watering Tips:
Maintaining even moisture across the entire lawn is important. Sprinkler systems should be checked to ensure all zones are covered – corners and edges are common trouble spots that sprinkler patterns might miss. If hand-watering with a hose, be diligent to move sprinklers around or water uniformly. In the first couple of weeks, do not rely on rain alone unless it’s a steady soaking rain. A brief shower might not wet the soil enough to count, so when in doubt, water manually after. Conversely, if heavy rainfall occurs, you can skip scheduled watering to avoid overwatering. After watering, lift a corner of sod in a few spots to verify the soil is moist (this is a handy test especially in week 1). If it’s dry underneath, increase watering time or frequency; if it’s sopping and smells swampy, ease up a bit. Proper watering in these first weeks makes all the difference in how well and how quickly your sod lawn gets established.
Mowing and Fertilizing Timelines
Knowing when to mow and fertilize a new sod lawn will help you avoid damaging the young grass and will set the lawn on a path to long-term health. Here’s how to handle mowing and feeding for your new sod:
Mowing New Sod for the First Time
Patience is key when it comes to the first mow. Do not mow the sod too soon. Cutting it before the roots have anchored can cause the strips to shift or even get sucked up by the mower. Typically, you should wait about 2–3 weeks after installation for the first mowing. A simple test: gently tug up on a corner of a sod piece. If it still lifts easily or feels loose, it’s not ready. If you feel resistance and the sod stays put, the roots have grabbed into the soil, meaning it’s safer to mow.
Often, new sod (especially if it's fertilized by the farm) can grow quite tall in those first couple of weeks. You might see it getting shaggy at 3–4 inches high. When it’s time for the first mow, set your mower to a high setting – around 3 inches or whatever is the upper range for your grass type. Never remove more than one-third of the grass blade height in a single mowing. For example, if the grass is 4.5 inches tall, cut it to 3 inches (removing 1.5 inches). Cutting too short (scalping) is very stressful to any lawn, and especially to new sod. A higher cut also encourages deeper roots and thicker turf.
Use a push mower or walk-behind mower for the first mow if possible. These are lighter and cause less disruption. A riding mower is heavy and its powered wheels turning on new sod can rip up sections or create ruts. Also, make sure your mower blade is sharp. A dull blade might yank the young grass instead of slicing cleanly, which can pull up sod edges. Mow when the grass is dry (to avoid clumping and slipping). Take it slow and avoid quick turns or sudden stops, which can dislodge the sod. If your lawn is large, you may not want to mow all in one day if the sod is very new – walking extensively on it is not ideal yet – but generally if it’s ready for mowing, light foot traffic is okay.
After the first cut, your lawn will instantly look more manicured and any uneven growth will be evened out. Continue to mow about once a week (or as needed) thereafter, following the one-third rule each time. Keep the mower at a reasonable height (most turf grasses do well around 2.5–3 inches; some warm-season grasses like Bermuda can be kept shorter). Mowing regularly will also encourage the lawn to thicken up. And remember: even after the first mow, try not to subject the sod to heavy traffic (kids play, pets, parties) until around the 3-4 week mark, when it’s truly rooted strongly.
Fertilizing New Sod
Feeding your new sod will supply the nutrients needed for root establishment and vigorous growth, but timing and the type of fertilizer matter. If you followed good preparation practices, you may have already applied a starter fertilizer before or right after laying the sod. Starter fertilizers are usually high in phosphorus (the middle number in N-P-K, like an 18-24-12 formula, for example) because phosphorus supports root development. Assuming you did apply a starter during installation, your new sod won’t need another dose of fertilizer for a little while. Over-fertilizing too early can actually harm the young grass or cause excessive top growth at the expense of root growth.
A common recommendation is to wait until after the sod has been mowed the first time to do the next fertilization. That puts it roughly 3–4 weeks after installation. At that point, you can apply a balanced slow-release lawn fertilizer to give the grass a boost as it enters full growth mode. Choose a fertilizer suitable for your grass type and season – for example, a general-purpose lawn fertilizer with a ratio somewhere around 3-1-2 (like 24-8-16 N-P-K) or similar is often good, or follow any specific guidance from the sod farm if they provided instructions. Always read the label for application rates so you don’t accidentally burn the lawn by spreading too much. Apply when the grass is dry, then water it in thoroughly.
If no starter fertilizer was applied at installation, you could apply a light dose of starter fertilizer about 1–2 weeks after laying the sod to help it along. But be cautious with this – more is not better. It’s easy to scorch new grass with fertilizer. When in doubt, lean towards a milder feeding later rather than a heavy feeding too soon.
Looking at the longer term fertilizing schedule: for an established lawn, many experts suggest fertilizing around 2–4 times a year. A simple schedule for cool-season lawns (like Kentucky bluegrass, fescue) is to feed in mid/late spring and early fall as primary times, with an optional late fall (October) “winterizer” feeding and maybe a light summer feeding if needed. For warm-season grasses (like Bermuda, St. Augustine), late spring and summer are the prime feeding times. Since this guide is focused on installation, we won’t go deep into annual schedules, but as a general rule, don’t fertilize new sod during the heat of midsummer or dead of winter when the grass is not actively growing. And avoid high-nitrogen fertilizer in the first few weeks that would push a lot of leaf growth before roots are ready. After that initial establishment phase, feeding your lawn regularly (along with proper watering and mowing) will keep it dense and green.
A note on other lawn chemicals: Besides fertilizer, you might wonder about things like herbicides or pest control on new sod. It’s typically recommended not to use any weed killers or herbicides on new sod for at least the first few months, because the lawn is tender and can be easily damaged by chemicals. If you prepared the soil well and used quality sod, weed pressure should be minimal at first. You can spot-pull any stray weeds that appear. Once the lawn is mature (after maybe 3–4 mowings or a couple of months), you can consider weed control products if needed. Similarly, avoid using lawn insecticides or fungicides unless absolutely necessary in the early period – focus on proper watering and care which usually prevents disease. If you see signs of disease or pests, consult with a lawn care professional for gentle solutions suitable for new lawns.
Common Mistakes to Avoid
Even with the best intentions, some pitfalls can derail a sod installation project. Here are some common mistakes to watch out for, and how to avoid them:
- Skimping on Soil Preparation: One of the biggest mistakes is not properly preparing the soil before laying sod. If you lay sod over compacted, poor soil or on top of existing grass/weeds, the sod is likely to struggle or fail. Avoid this by taking the time to remove old vegetation, loosen the soil, level the area, and add amendments as needed. Remember, sod roots need a hospitable environment to grow into; they won’t magically fix grading issues or bad soil. Poor prep can lead to sod that doesn’t root (you’ll be able to pull it up easily even weeks later) or an uneven lawn that develops dry spots or stays soggy in low spots.
- Not Laying Sod Immediately (or Properly Storing It): Fresh sod is living grass and can perish if it’s not installed promptly. Leaving rolls of sod sitting on the pallet for days will cause them to dry out or overheat (sod rolls generate heat and can get moldy or yellow in the middle of the stack). To avoid this, plan your project so that you can start installation as soon as sod is delivered. If there’s a delay, keep the sod in the shade, unstack the rolls if possible, and water them lightly to keep them damp. Also, never lay sod that’s dried out or heat-damaged – it’s unlikely to recover well.
- Leaving Gaps or Overlaps Between Sod Pieces: Gaps between sod pieces expose soil, which can dry out edges and invite weeds to germinate. Overlapping pieces, on the other hand, create raised areas that won’t root well and will dry out or get scalped by the mower. Both gaps and overlaps result in an uneven lawn. Avoid gaps and overlaps by laying each piece tightly against the next. If you end up with a gap, fill it with a bit of topsoil or a small plug of sod. If pieces overlap, trim them so they fit flat. Always stagger seams in a brick-like pattern to minimize continuous lines. Taking the time to fit pieces properly will pay off with a seamless, carpet-like lawn.
- Failing to Press Sod Into Soil: Simply laying sod on the ground isn’t always enough – if there are air pockets underneath, parts of the sod won’t make contact with soil and those sections can dry out and die. A common oversight is skipping the step of rolling or tamping the sod after installation. Without pressing the sod down, you might see uneven areas or notice later that some sections never rooted. To avoid this, always roll or tamp the sod once it’s laid. It doesn’t take long, but it ensures good soil contact across the entire lawn. If you don’t have a roller, use a flat board to step on as described earlier. This step also reveals any lumps or dips that you can correct early on.
- Overwatering or Underwatering: New sod needs plenty of water, but it’s possible to overdo it or, conversely, to underwater out of fear of overwatering. Overwatering can leave the soil waterlogged and oxygen-deprived, which can cause roots to rot or prevent them from growing downward (why grow deep roots if water is always at the surface?). It can also encourage fungal diseases. Underwatering, of course, will cause the sod to dry out, leading to shrinkage, browning, or even sections dying and peeling back. The mistake is usually not monitoring the moisture or not adjusting for weather. Avoid these extremes by checking your lawn daily, especially in the first two weeks. The soil beneath should stay moist but not soupy. If you see persistent puddles or fungus (mushrooms or mold) growing, cut back the watering. If you see the grass wilting, imprints that don’t bounce back, or dry soil beneath, increase watering. Stick to the recommended schedule but always use your eyes and touch to fine-tune it.
- Mowing Too Soon or Too Low: Eager to see a tidy lawn, some folks make the mistake of mowing new sod too early or cutting it very short. This can be disastrous – mowing early can snag or rip out unrooted pieces, and cutting too low (scalping) shocks the grass and scalps the edges of each sod strip (which are more prone to drying). Avoid this by waiting until the sod is firmly rooted (usually at least 2 weeks) for the first mow, and even then, mowing high. Also, don’t let a lawn service with heavy equipment onto the new sod right away; if you normally have a landscaping crew, tell them to skip a couple weeks or just trim by hand if absolutely needed. Your new lawn doesn’t need a buzzcut – give it time to get established.
- Ignoring Edge Pieces: The edges of a new sod lawn (along sidewalks, driveways, or the perimeter) tend to dry out faster because they’re exposed. A mistake is forgetting to give them a little extra care. They might need more frequent watering (a quick hand-watering on hot afternoons) to stay as moist as the interior sections. Also, ensure the edges are well pressed down and not left slightly raised. During installation, some people forget to properly trim and press edges, which can leave them vulnerable. Keep an eye on edges and corners and don’t let them curl up or dry out.
By steering clear of these common mistakes, you greatly increase the odds that your sod installation will be a stunning success rather than a costly lesson. If you’ve prepared well, installed carefully, watered diligently, and exercised a bit of patience with mowing, you’ve done everything in your power to get that postcard-perfect lawn.
Long-Term Sod Care Tips
Congratulations – after a few weeks of attentive care, your sod is now on its way to becoming a mature lawn! But the work doesn’t stop once the sod is rooted. Long-term maintenance will keep your lawn healthy, green, and lush for years to come. Here are some tips for caring for your sod lawn in the long run:
- Water Wisely and As Needed: Once established, your lawn’s watering needs will depend on your local climate, season, and grass type. In general, aim to provide about 1 inch of water per week (including rainfall) to keep the grass healthy. It’s best to water deeply but infrequently – for example, one or two thorough waterings per week – rather than a little bit every day. Deep watering encourages the roots to grow down deeper into the soil, which makes the lawn more drought-tolerant. Continue to water in the early morning when possible, since midday watering can evaporate quickly and evening watering can invite disease. During hot, dry spells, you might need to water more often. In cooler or rainy periods, you can water less. Established lawns can handle a bit of drying out between waterings (in fact, it’s healthy for them), but try not to let your sod lawn go completely bone dry for extended periods, especially in its first year when it’s still strengthening its root system.
- Mow Regularly with Good Practices: Regular mowing is crucial for a neat appearance and for grass health. For most lawns, mowing once a week during the growing season is sufficient, though it can vary (fast-growing times like spring might need a mow every 5 days; slower growth in summer heat might be every 2 weeks). Always follow the “one-third rule”: never cut more than one-third of the grass blade length in a single mowing. For example, if your grass is 3 inches tall, cut it to no lower than 2 inches. Cutting more can stress the grass and scalp the lawn. Maintain the recommended mowing height for your grass species – many cool-season lawns (fescue, bluegrass) do well around 2.5 to 3 inches high, while some warm-season grasses (Bermuda, Zoysia) can be kept shorter, around 1.5 to 2 inches. Keep your mower blades sharp, and mow when the grass is dry to avoid tearing and disease spread. It’s usually best to leave grass clippings on the lawn (“mulch mow”) as long as they aren’t clumping heavily – the clippings decompose and return nutrients to the soil. And vary your mowing pattern (direction) occasionally to avoid soil compaction or ruts from the mower wheels.
- Fertilize on a Schedule: After that initial establishment phase, your lawn will benefit from regular feedings. A typical schedule is to fertilize a few times per year. For example, many lawn care experts suggest feeding in spring (to boost growth as the lawn comes out of winter dormancy) and fall (to help the grass store energy and strengthen roots for the next year). An optional midsummer feeding can be done if the lawn is actively growing and not under heat stress, and some people also do a late fall (dormant season) feeding for cool-season grasses. Use a slow-release granular fertilizer formulated for lawns, which will nourish the grass steadily without causing rapid, weak growth. Follow the label instructions for how much to apply – over-fertilizing can burn the lawn or cause excessive growth that requires constant mowing and more water. Also, different regions have different nutrient needs, so it might be worth doing a soil test every couple of years to fine-tune your fertilizer regimen. Remember to water after fertilizing to wash the nutrients into the soil.
- Weed and Pest Management: A dense, healthy sod lawn will naturally resist many weeds, but inevitably a few weeds might appear (from wind-blown seeds or dormant seeds in soil). The best defense is regular mowing and proper lawn care, as weeds often take hold in weak or scalped areas. If weeds do become a problem, you can use appropriate lawn herbicides, but make sure the lawn is mature enough (usually after at least 3 months or several mowings) before applying weed killers. Always follow product guidelines, and spot-treat if it’s just a few weeds rather than applying chemicals to the whole lawn. As for pests (like grubs or insects), keep an eye out for any patches of grass that turn brown or show signs of disturbance (for example, raccoons digging, which can indicate grubs). Treat pest issues as needed, but avoid harsh chemicals as a preventative – only use them if you identify a real problem. Many lawns never need insecticides if well cared for.
- Aeration and Overseeding: Over time, especially in high-traffic areas, the soil under your sod can become compacted. Compaction makes it harder for water, air, and nutrients to reach the roots. A good practice is to aerate your lawn periodically. Lawn aeration involves perforating the soil with small holes (commonly done with a core aerator that pulls out plugs of soil). This is typically done once a year or once every couple of years, often in the fall for cool-season lawns or late spring for warm-season lawns. Aeration loosens soil and promotes root growth. If you have a cool-season grass lawn and some areas have thinned over time, you can also overseed after aeration to keep the turf thick (overseeding is usually done in early fall or spring by spreading grass seed over the existing lawn). Thick grass not only looks better but also chokes out weeds.
- Seasonal Considerations: If you live in an area with distinct seasons, adapt your care accordingly. In hot summers, avoid mowing the grass too short – a slightly taller lawn can shade its own roots and retain moisture better. Also, you might reduce fertilizer during peak heat to avoid stressing the grass. In cold winter climates, do a final mow before winter (not too short, just tidy it up), clear off leaves in the fall (heavy leaf cover can smother grass), and your lawn will go dormant. Newly sodded lawns that face their first winter should be fine as long as they were installed well before the first freeze and have rooted; just avoid heavy traffic on frozen grass to prevent crown damage. In climates without frost, your lawn might grow year-round and will need consistent care throughout.
- Monitoring and Adjusting: Long-term lawn care isn’t entirely “set it and forget it.” Pay attention to how your lawn responds. If you notice certain areas that always dry out or puddle, adjust your watering or address any soil issues (like adding topsoil to a low spot or improving drainage). If the color is pale or growth is slow, a fertilizer boost might be needed. If the lawn is too dense and developing thatch (a layer of undecomposed grass), you might need to dethatch or adjust watering/fertilizing practices. The key is to give your sod lawn some regular TLC and it will reward you by staying lush and green.
By following these long-term care practices – proper watering, consistent mowing, sensible fertilizing, and occasional lawn maintenance like aeration – your sod lawn will remain a source of pride. The hard work of installation and the attentive early weeks will pay off every time you gaze out at your vibrant, healthy grass. Enjoy your lawn! It’s not just an investment in your property; it’s also a space to relax, play, and make memories on a carpet of green. With the knowledge from this guide, you can confidently maintain your sod for the long haul, keeping it as beautiful as the day it was installed.
Ready To Order?
Fresh-Cut Sod Delivered
CT Sod delivers Kentucky Bluegrass, Tall Fescue & RTF sod across CT, MA, NY, NJ, RI, NH, VT & ME.
Keep Reading

1,000 Square Foot Sod Prep and Installation in Wilton, CT
April 11, 2026
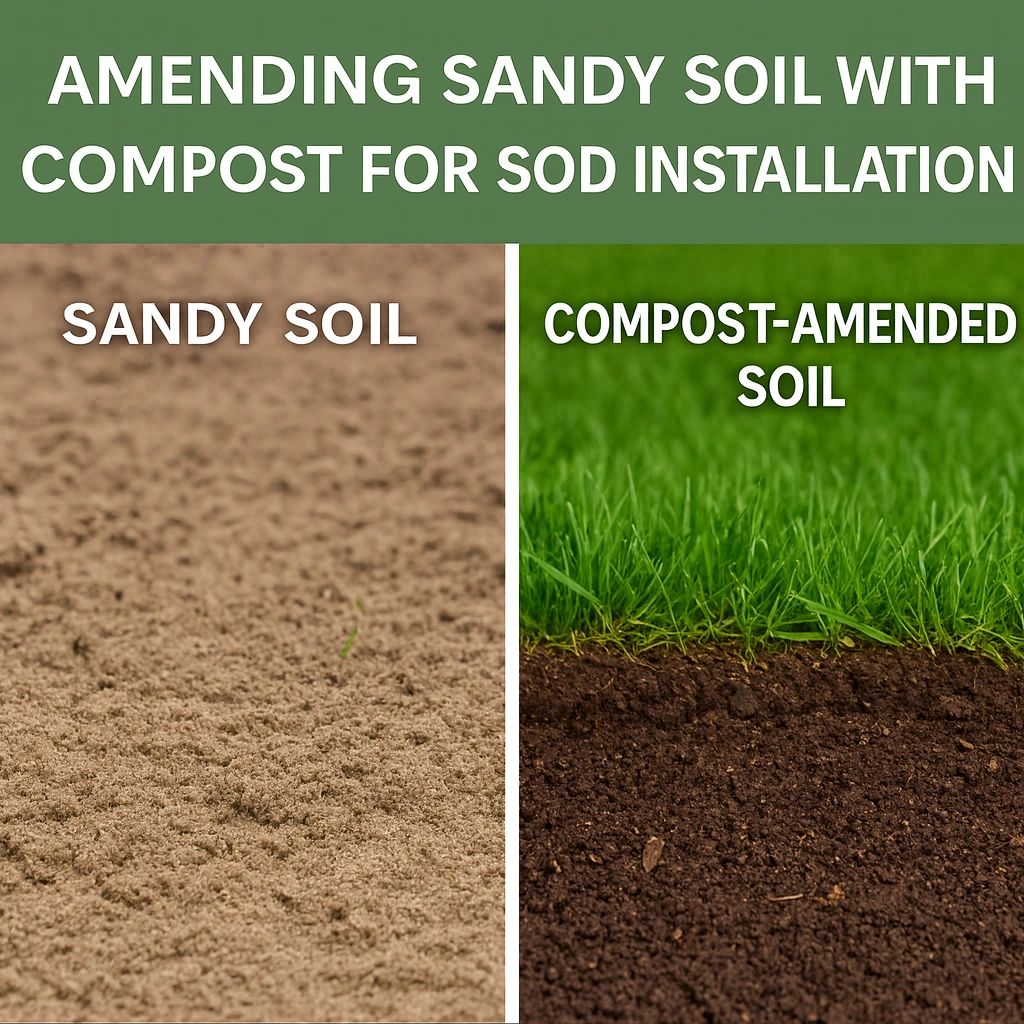
Amending Sandy Soil with Compost for Sod Installation CT, NY, MA
August 25, 2025

Best Drought-Tolerant Sod Varieties: Northeast Guide
April 30, 2026

Best Sod for Connecticut Lawns: Complete Regional Guide
April 28, 2026